How to Set Up a Grow Tent: Your Complete Indoor Grow Guide
· 15 min read · Updated May 14, 2026
A grow tent doesn't just make indoor cultivation tidier — it fundamentally changes the odds in your favour. The global grow tent market was valued at roughly $778 million CAD in 2024 and is projected to nearly double by 2034, and that growth is driven almost entirely by home cultivators who've discovered what controlled environments can do for a harvest. If you're about to set one up for the first time, here's everything you need to know to do it right.
Why a Grow Tent Is the Foundation of Any Serious Indoor Garden
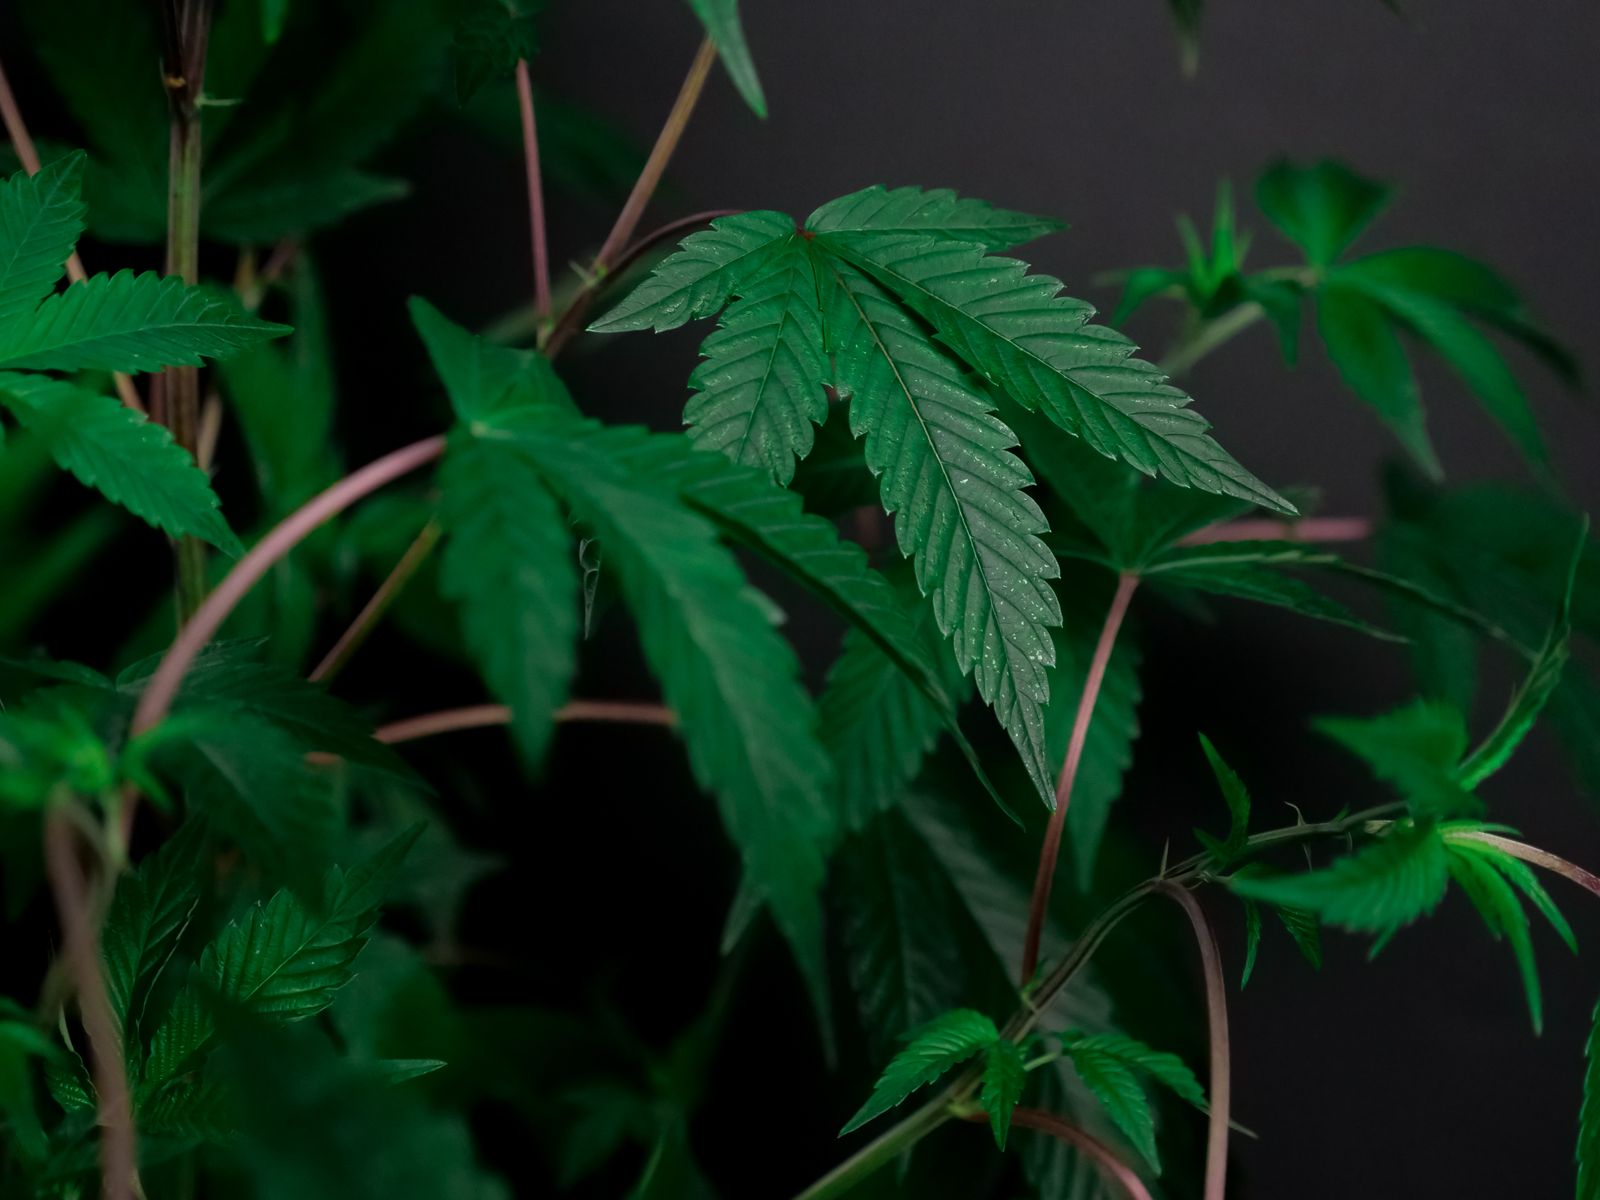
Most new growers underestimate what a tent actually does. It isn't just a fabric box to hide your plants — it's a precision microclimate tool, and understanding that distinction will shape every decision you make.
The reflective mylar interior (typically 95–98% reflectivity in quality tents) bounces photons back onto your canopy, meaning you extract more usable light from every watt you're paying for. The sealed shell creates negative pressure when your exhaust fan runs, so every cubic foot of air in the tent is moving in a deliberate direction. And the zippered doors mean your plants never experience the random temperature swings, pest vectors, or humidity fluctuations of the surrounding room.
- Temperature: Maintain a warm lights-on period and a slightly cooler lights-off period, mimicking the natural diurnal cycle that triggers healthy resin production.
- Humidity: Dial in precise vapour pressure deficit (VPD) values for each growth stage — something nearly impossible in an open room.
- Lighting: Reflective walls recycle light that would otherwise be wasted, effectively increasing your PPFD (photosynthetic photon flux density) without buying a bigger fixture.
A grow tent also handles the practical realities of Canadian home cultivation under the Cannabis Act, which permits adults to grow up to four plants per residence. Discretion matters. A zipped tent contains both visual evidence and aromatic evidence in one elegant package.
This isn't a niche concern: if you're pairing premium genetics — say, an autoflowering strain like big shift, the potent, fast-finishing auto that has earned its name, with a well-designed tent environment, you're giving elite genetics a stage worthy of their expression. The alternative is hoping your basement temperature doesn't swing eight degrees on a cold January night. It will.
A grow tent is your best tool for consistency. Plants love a stable environment, and a tent delivers that by isolating them from the changing conditions of your home.
Your Essential Grow Tent Equipment Checklist
Before we get into assembly, here's every component you'll need and precisely what it contributes:
| Component | Function | Why It Matters |
|---|---|---|
| Grow Tent | Creates a self-contained environment | Light-proofing, reflective walls, structural mounting points |
| Grow Light | Drives photosynthesis | The single most critical factor for yield and potency |
| Inline Exhaust Fan | Exchanges stale air for fresh | Controls temperature, humidity, and CO₂ replenishment |
| Carbon Filter | Scrubs odours from exhaust air | Essential for discretion under Canadian Cannabis Act rules |
| Ducting | Connects fan and filter | Channels air efficiently with minimal pressure drop |
| Circulation Fans | Moves air inside the canopy | Strengthens stems, prevents stagnant humid pockets |
| Digital Hygrometer/Thermometer | Monitors temperature and RH% | Real-time data for intelligent climate adjustments |
| Timer | Automates light schedule | Delivers the consistent photoperiod cannabis depends on |
Choosing the Right Tent Size and Gear for Your Goals
The worst mistake new cultivators make is buying gear that doesn't match their space. A 4×4 tent crammed into a room where the door won't fully open becomes a frustrating obstacle course on every maintenance day.
Measure your available floor space and — critically, your ceiling height before purchasing anything. Most tents run 1.5 to 2 metres tall. Add at least 30 cm above the tent for heat dissipation and access to the exhaust port. Then ask yourself one honest question: how many plants, and what type?
- Autoflowering cultivars: Compact, fast-finishing, and forgiving of tighter quarters. A 60×60 cm (2×2 ft) tent suits one or two autos beautifully; a 60×120 cm (2×4 ft) tent comfortably runs four. Their predictable, age-triggered flowering makes them ideal for first-time tent growers.
- Feminised photoperiod cultivars: These can stretch aggressively during the flip — some sativa-dominant varieties doubling or tripling in height between the 12/12 trigger and week three of flower. A 120×120 cm (4×4 ft) tent is the sensible minimum if you plan to run Screen of Green (SCROG), topping, or extended vegetative periods.
Lights: LED vs. HPS — There's Only One Practical Answer for Most Canadians
High Pressure Sodium (HPS) lights produce spectacular yields in optimised commercial facilities. In a sealed home tent, they create a heat management problem that cascades through every other variable — you fight your cooling equipment to keep temperatures below 28°C while simultaneously paying more per kilowatt-hour than an equivalent LED.
A quality full-spectrum LED designed around Samsung LM301 diodes or equivalent technology delivers a broad, plant-usable spectrum from 380 to 780 nm, runs at 40–50°C surface temperature rather than 300°C+, and consumes roughly half the wattage for equivalent PPFD. In provinces where electricity rates are climbing — Ontario's time-of-use pricing, for example, that efficiency matters over multiple growing seasons.
When shopping, match the light's stated flowering coverage area to your tent's footprint precisely. A light rated for a 90×90 cm flower footprint will leave the perimeter of a 120×120 cm tent underlit, reducing edge-plant yield noticeably. Your light is the engine of your grow. Don't downgrade it to save $80.
Ventilation: Sizing Your Fan to Your Tent Volume
Inline fans are rated in CFM (cubic feet per minute). Your target is to exchange the tent's entire air volume every one to three minutes. Calculate tent volume as length × width × height in feet.
A standard 120×120×200 cm (4×4×6.5 ft) tent holds roughly 104 cubic feet. A fan rated at 150–200 CFM handles this comfortably, leaving headroom for resistance losses through the carbon filter and ducting bends. Always pair your fan and filter at the same duct diameter — 150 mm (6 in) is the most common for mid-sized tents, and within 20% of the same CFM rating to ensure the filter is actually processing all exhausted air.
Step-by-Step Tent Assembly Without the Frustration
Think of this as adult LEGO. The poles click together, the canvas pulls over the frame, and the gear hangs from the support bars. Done right, the whole process takes about two hours for a first-time build.
1. Build the Frame First, Then Dress It
Lay all poles and corner connectors on the floor before you start joining anything. Most manufacturers colour-code or label their poles; confirm you know which pieces go where before committing. Build the base rectangle on the floor, add the verticals, then connect the top frame. Leave all joints slightly loose until the entire skeleton is standing — this lets you adjust alignment before locking everything down.
Pro tip: Zip in the floor tray before pulling the canvas over the frame. Trying to wrestle the tray into a fully assembled tent is a ten-minute argument you will lose. That tray is your last line of defence against watering spills reaching your floor.
Once the canvas is on, zip every door and vent closed and look for any light leaks at the seams or port openings. Light leaks during the dark period can stress photoperiod plants enough to trigger hermaphroditism.
2. Hang Your Light Dead-Centre
Ratchet hangers — the adjustable straps that come with most modern LEDs, are one of the most useful tools in your tent. They let you change the light-to-canopy distance in seconds rather than unhooking the fixture entirely. Attach both hangers to the same support bar at the top of the tent and clip onto the light's hanging points. Check that the fixture is centred over your future canopy from both directions.
Starting heights vary by wattage and manufacturer, but a general guide: seedlings benefit from the light at 60–75 cm above the canopy; late-veg and flower, 40–50 cm. Adjust as your plants grow. Too close causes light bleaching and heat stress; too far causes internode stretching and airy buds.
3. Install the Ventilation System for Negative Pressure
Negative pressure is the core principle here: the exhaust fan pulls more air out than passively flows in through the intake vents, creating a slight inward flex in the tent walls. This guarantees all exhaust passes through your carbon filter rather than seeping through seams.
- Filter and fan inside (recommended): Hang the carbon filter from the top support bars using rope hangers or heavy-duty straps. Connect a short section of ducting from the filter's outlet to your inline fan's inlet. Run a second duct from the fan outlet out through one of the tent's upper vent ports to your exhaust destination.
- Fan inside, filter outside: If headspace is tight, hang only the fan inside and connect ducting to an external filter. Slightly less effective at noise containment, but saves 15–20 cm of vertical clearance.
Seal every ducting connection with the included clamps and wrap joints with aluminium tape. Any air bypass around the filter defeats its purpose entirely. For a complete beginner-friendly equipment overview, our guide to the simplest starter grow setup for first-time cultivators is worth reading alongside this one.
4. Position Your Internal Circulation Fans
Your exhaust fan handles air exchange; circulation fans handle air movement within the canopy. These are two entirely different problems. Clip-on fans positioned at mid-canopy height, angled to create a gentle oscillating breeze across the leaves, accomplish three things simultaneously: they mechanically stress stems into building more structural fibre (which pays off enormously during heavy flower development), they prevent the humid boundary layer that forms around leaf surfaces from thickening into a mould risk, and they distribute heat and CO₂ evenly across the canopy.
Gentle is the operative word. Leaves should ripple, not thrash. A few inexpensive clip-on fans — two for a 4×4 tent, make a measurable difference in both plant health and final bud density.
Dialling In Climate and Light Schedule
Your tent is assembled and your gear is running. Now comes the work that actually separates average harvests from exceptional ones: precision environmental management.
Temperature, Humidity, and VPD by Growth Stage
Cannabis doesn't want the same conditions from seedling to harvest — it wants a specific progression, with temperature and humidity gradually tapering as the plant matures. Here's your reference chart:
| Growth Stage | Ideal Temperature (°C) | Ideal Relative Humidity (%RH) |
|---|---|---|
| Seedling | 24–27°C | 65–70% |
| Vegetative | 22–26°C | 50–60% |
| Flowering | 20–24°C | 40–50% |
| Late Flower | 18–22°C | 30–40% |
High humidity in late flower — anything above 50% RH once dense buds have formed, is the single most common cause of Botrytis cinerea (bud rot), a catastrophic and usually invisible problem until harvest. Don't negotiate on those late-flower numbers. If you're struggling to push humidity down, our detailed guide on humidity management covers both raising and lowering strategies with specific tool recommendations.
Light Schedule: Photoperiod vs. Autoflower
Plug your grow light into a programmable timer on day one. For photoperiod feminised genetics, the vegetative stage runs on an 18/6 cycle (18 hours light, 6 hours darkness). When your plant has filled roughly half its intended canopy footprint — or when you've completed your training and are ready to trigger flower, switch the timer to a strict 12/12. Any light intrusion during the 12-hour dark period can revert flowering plants to vegetative growth or stress them into producing male flowers.
Autoflowering genetics operate by a completely different logic. They flower based on chronological age rather than photoperiod, which is why many growers run autos on an uninterrupted 18/6 or even 20/4 from seed to harvest. The tradeoff with autos is inflexibility: because they're on a biological clock, there's no pausing vegetative growth to recover from stress or training damage. Choose your grow medium carefully before you start — read our guide on how to choose the right cannabis growing medium to understand how soil, coco coir, and hydro each interact differently with both plant types and feeding schedules.
Electrical Safety in a Humid Environment
You're running powerful electrical equipment in a space that gets wet. This warrants explicit attention, not a footnote.
- Use a GFCI surge protector: A Ground Fault Circuit Interrupter cuts power the instant it detects current leaking to ground — exactly what happens if water contacts live circuitry. This is non-negotiable in a grow environment.
- Organise and elevate cords: Route all wiring up the tent poles and off the floor using zip ties or velcro straps. Every cord on the floor is a cord that will eventually get wet.
- Create drip loops: Form a U-shaped downward bend in every power cord before it reaches the outlet. Any water that migrates down the cord will drip off the bottom of the loop rather than running into the socket.
First Grow Troubleshooting and Plant Care Fundamentals
Your first cycle will teach you more than any article can. What follows is a practical guide to the problems that trip up nearly every first-time tent grower, and how to read your plants well enough to catch issues before they compound.
Reading Common Environmental Problems
Temperature and humidity rarely stay perfectly stable — your home environment changes with seasons, and a cold snap in November will lower the temperature of the air your tent is drawing in. Here's how to respond:
- Tent running too hot: Increase exhaust fan speed first. If it's already at maximum, check that passive intake vents are fully open and unobstructed. Improving the volume and coolness of incoming air is often more effective than simply pulling exhaust faster.
- Humidity spiking: This usually accompanies high temperature. Increase exhaust speed and, if the problem persists through flower, consider a compact dehumidifier inside the tent. Solid air exchange is your primary defence against the humidity-driven mould that can destroy a late-flower crop in 48 hours.
- Leaves turning yellow at the top of the canopy: This is the signature of light burn when accompanied by bleaching and curling leaf margins. Raise your light using the ratchet hangers and cross-reference the manufacturer's recommended height for the current growth stage. If yellowing is occurring throughout the plant rather than specifically at the top, the cause is more likely nutritional.
The single most important skill you'll develop is simple observation. Spend five minutes every day just looking at your plants. Check the leaves, feel the growing medium, and pay attention to the air. Your plants will tell you everything you need to know.
Watering: The One Mistake That Ends More Grows Than Any Other
Overwatering kills more first-time grows than pests, light problems, and nutrient deficiencies combined. It's counterintuitive — more water feels like more care, but waterlogged roots are starved of oxygen, and root rot follows quickly.
Cannabis wants a wet-dry cycle. After a thorough watering, the growing medium should dry down to the point where the pot feels noticeably lighter before you water again. The lift test is reliable: weigh the pot in your hands immediately after watering, then lift it daily. When it feels significantly lighter — roughly 30–40% of the saturated weight, water again thoroughly, until runoff appears from the drainage holes.
The finger test supplements this: push your index finger 3–5 cm into the medium. If it comes out with moist particles clinging to it, wait. If it comes out dry, it's time.
A Practical Nutrient Strategy for Your First Cycle
The nutrient industry is designed to sell you complexity you don't need on your first grow. A basic two-part grow-and-bloom liquid nutrient line appropriate to your chosen medium — different formulations exist for soil versus coco versus hydro, is all you require. For deeper context on feeding schedules and macronutrient ratios through each growth stage, our guide to nutrients for cannabis breaks it down clearly.
The most important rule: start at half the manufacturer's recommended dose. Cannabis is far more forgiving of mild underfeeding than of nutrient burn. Dark green, waxy, downward-clawing leaves are the classic sign of nitrogen excess — ease back immediately. Pale, slightly yellowed new growth between the veins typically signals a micronutrient deficiency, often exacerbated by pH drift.
Keep your pH in range: 6.0–7.0 for soil, 5.8–6.3 for coco and hydro. More nutrient problems are caused by pH lockout than by actual deficiency.
Plant Count and When to Flip to Flower
Crowding is one of the more seductive mistakes in tent growing — more plants feels like more yield, but the reality is reduced airflow, increased mould risk, and canopy competition that results in lower individual plant quality.
A practical starting framework:
- Autoflowers in a 4×4 tent: Four plants is a sensible number. Autos stay compact and don't require a flip, so timing is set by the plant's internal schedule rather than your intervention.
- Feminised photoperiods in a 4×4 tent: Start with one or two plants, especially if you plan to employ training techniques. These plants can double or triple in height between the 12/12 flip and week three of flower. Flip when your plant occupies roughly half the canopy footprint you want at harvest — they'll fill the rest during the stretch.
For strain selection specifically optimised for tent environments, our editorial roundup of the 10 best indoor weed seeds covers genetics that perform reliably within the constraints of limited vertical height, moderate lighting, and home-scale ventilation.
Frequently Asked Questions About Grow Tent Setup
Can I grow successfully in a 2×2 tent?
Absolutely. A 60×60 cm tent is perfectly sized for one autoflower or one trained photoperiod plant. Scale your equipment accordingly: a lower-wattage LED (150–200W is typical), a 100 CFM inline fan, and a 100 mm carbon filter. Attempting to run oversized equipment in a small tent creates heat and noise problems that outweigh any perceived benefit.
What does a complete setup realistically cost in Canada?
For a solid entry-level 2×4 or 4×4 setup — quality LED, inline fan, carbon filter, tent, and basic monitoring equipment, budget between $500 and $800 CAD. You can come in below that range with careful deal hunting, and high-end setups can run well into the thousands. The key framing: this equipment is durable and will support multiple harvests over several years. Consider the cost against what you'd spend on equivalent quality cannabis over the same period. The math tends to strongly favour growing your own after the second harvest.
Does tent exhaust have to vent outside the room?
Ideally, yes. Ducting your exhaust to a window vent or exterior port removes hot, humid air from the equation entirely, giving your tent a consistent supply of cooler, drier intake air. If that isn't possible, venting into the same room works — but the room's ambient temperature and humidity will rise over time, eventually limiting how well your tent can cool and dehumidify itself. If you must vent within the room, ensure the room itself is large and reasonably well-ventilated.
Why do I need both an exhaust fan and circulation fans?
They solve fundamentally different problems. Your inline exhaust fan manages air exchange — it determines what air is inside the tent at any given moment. Your circulation fans manage air movement, they determine whether that air is actively flowing around and through your canopy or sitting in stagnant pockets. Both are essential. A tent with excellent air exchange but no internal circulation will still develop humid microenvironments around dense foliage where mould thrives. A tent with good circulation but poor exchange will gradually heat up and accumulate CO₂-depleted air regardless of how well the fans are moving it around.
Setting up a grow tent is genuinely one of the most satisfying projects a Canadian cannabis cultivator can undertake — and one that keeps paying dividends with every harvest you pull from it. The framework is straightforward: a well-matched tent, a properly sized LED, a correctly spec'd ventilation system, and the discipline to monitor your environment daily. Everything else, training techniques, advanced feeding, phenotype selection, builds on that foundation. Get the fundamentals right and your plants will do the rest. Explore the Growing Marijuana resource library for deeper dives on every topic covered here, and when you're ready to choose genetics worthy of your new setup, Pacific Seed Bank has hundreds of premium autoflowering and feminised cultivars available across Canada.
Keep Reading

How Much Does It Cost To Grow Your Own Weed in Canada?
Learn the real costs of growing weed at home, including grow tents, lights, seeds, nutrients, electricity, and how much cannabis you can harvest.

The 5 Best Blueberry Cannabis Strains To Grow Indoors
Find the best blueberry weed strains to grow indoors, including Blue Dream, Blueberry Cheesecake, and more - and buy the seeds from Pacific Seed Bank.

Why 5.8–6.5 Is The Ideal pH for Cannabis (And When to Adjust)
Learn why 5.8-6.5 is the ideal pH for cannabis plants, how to test your plant's pH, and how to adjust it higher or lower when you need to.

The Best Autoflowering Light Schedule For Bigger Yields
Stop guessing your autoflowering light schedule. Our guide breaks down the 18/6, 20/4, and 24/0 schedules to help you grow bigger, better plants.