How Often Should I Water My Weed Plants? A Grower's Guide
· 14 min read · Updated May 14, 2026
Every experienced grower has made the same early mistake: they set a watering schedule, stuck to it religiously, and wondered why their plants looked miserable. The truth is, cannabis doesn't care what day it is. Watering every two to three days is a useful starting point, but the real skill — the one that separates mediocre harvests from exceptional ones, is learning to read your plant and your environment together, in real time.
Whether you're a first-time cultivator or a seasoned home grower brushing up on technique, this guide will give you the framework to water your weed with precision and confidence at every stage of the plant's life.
Why a Fixed Schedule Will Let You Down
A cannabis plant's water demand is not static. It shifts constantly in response to its age, root volume, the medium it's growing in, ambient temperature, humidity, vapour pressure deficit (VPD), and the sheer metabolic pace of its current growth phase. A rigid calendar ignores all of this.
Think about what's actually happening inside the pot. A seedling with a root system the size of your thumbnail has almost no capacity to uptake large volumes of water. Flood it on a Tuesday because "it's watering day" and you've just saturated a medium those tiny roots cannot possibly drain — creating the anaerobic conditions that invite pythium and other root pathogens. Fast-forward twelve weeks: that same plant, now in full flower and pushing 120 cm tall, may genuinely need a deep soak every two days to fuel bud production.
The calendar cannot bridge those two realities. Your hands and eyes can.
The Variables Driving Your Plant's Thirst
- Plant age and root mass: More roots mean more uptake surface area and a dramatically higher daily water demand.
- Pot size and material: A 2-gallon plastic pot and a 7-gallon fabric pot behave entirely differently, even with the same strain and medium.
- Growing medium: Peat-heavy soil retains moisture for days; coco coir can be bone dry in 24 hours.
- Grow environment: High temperature, low relative humidity, and strong airflow all accelerate transpiration and evaporation.
- Growth phase: Seedling, vegetative, early flower, and late flower each carry distinct hydration requirements.
- Training intensity: Heavily defoliated plants transpire less moisture through leaves; lush, untrained canopies drink more.
Master the interplay of these variables and watering becomes intuitive rather than anxious.
Two Field-Tested Techniques That Replace the Guesswork
You don't need a soil moisture meter — though they don't hurt. Two free, tactile methods have guided experienced growers for decades, and they work just as well in a Canadian basement tent as they do in a licensed production facility.
The Pot Lift Test
Immediately after a thorough watering, lift your pot and hold it for a moment. Memorise that weight. Set it down, and come back 24 to 48 hours later. Lift it again. The difference in weight — sometimes surprisingly dramatic, tells you exactly how much moisture has left the medium. When the pot feels nearly weightless compared to your saturated baseline, it's time to water.
This method works because water is heavy. One litre weighs one kilogram. A 7-gallon fabric pot holding four litres of water will feel noticeably denser than the same pot after those roots have pulled most of that water into the canopy. After a week of daily lifts, your hands will calibrate themselves. You won't have to think about it.
The Finger Test
Push your index finger one to two inches into the top of the medium. If the soil at your fingertip feels dry and slightly warm, water now. If you detect any coolness or residual dampness, give it another 24 hours and check again.
Simple. Free. Consistently accurate. The finger test is especially useful as a secondary confirmation alongside the lift test, and it's the fastest way to catch overwatering before it causes root stress. An overwatered medium will feel cool and clammy at depth even when the surface looks dry — a critical warning sign.
Overwatering isn't about giving too much water in a single session — it's about watering again before the previous session has dried out sufficiently. The roots need oxygen as much as they need moisture. When the medium stays saturated, the oxygen supply collapses and roots suffocate. Data from grower communities consistently show that overwatering affects roughly 65% of novice cultivators and can reduce final yields by up to 35%. Water less often, but water more thoroughly when you do.
How Your Growing Medium Changes Everything
Your medium isn't just a substrate — it's the primary regulator of how water moves through your root zone. Choosing the right one for your setup has cascading effects on watering frequency, nutrient availability, and root health. For a full breakdown of the options, our guide on how to choose the right cannabis growing medium is the place to start.
A quality organic soil — loamy, well-amended, with good water-holding capacity, acts like a sponge. It retains moisture for two to four days in most conditions, giving beginners a generous margin for error. Microbes in living soil also buffer pH swings and break down organic nutrients gradually, which creates additional forgiveness if your timing drifts by a day.
Coco coir is the opposite of forgiving. It's nearly inert, drains almost immediately, and can dry out completely within 18 to 24 hours under grow lights. That speed is a feature, not a bug — roots love the oxygen-rich environment coco creates, but it demands daily attention and sometimes twice-daily watering in the final weeks of flower. Perlite mixes behave similarly.
Fabric pots amplify whichever medium you choose. They promote pruning of root tips through air exposure, which generates a denser, more fibrous root ball — excellent for nutrient uptake. The trade-off is significantly faster moisture loss through the pot walls. If you're running fabric pots in a warm, well-ventilated tent, expect to water 25–40% more frequently than you would in equivalent plastic containers.
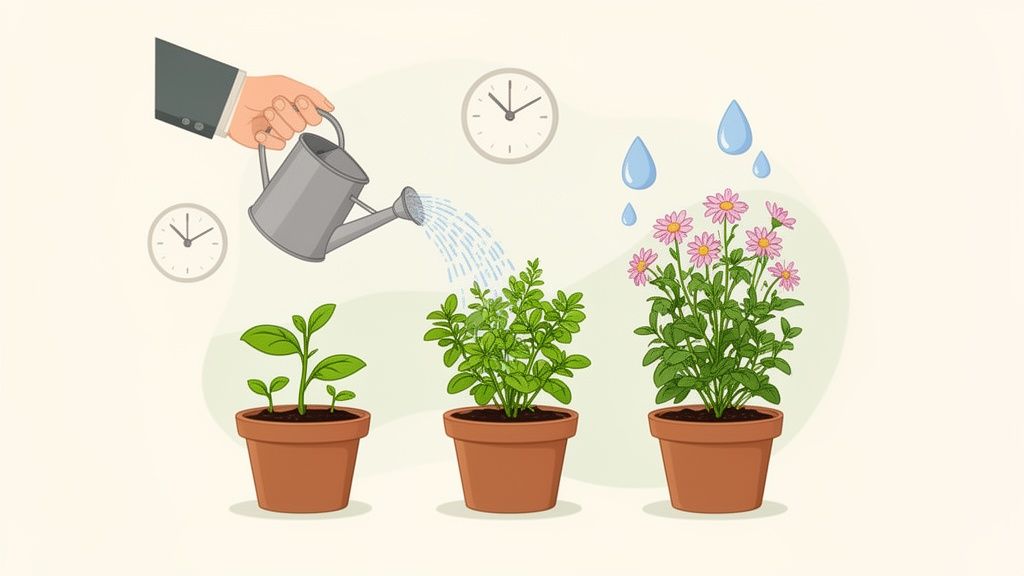
Watering Strategies for Every Stage of Growth
Cannabis moves through four distinct hydration phases from seed to harvest. Treating each stage identically is one of the most reliable ways to sabotage an otherwise solid grow.
Seedling Stage: Mist, Don't Flood
In the first one to two weeks after germination, your seedling's root system is fragile and extraordinarily small. It cannot uptake appreciable volumes of water, which means any excess moisture in the medium sits stagnant around those delicate tissues and creates pathogen pressure.
Use a clean spray bottle. Mist the surface of the medium until it's evenly damp — not wet, and repeat only when the top centimetre has dried out. You're creating a consistently moist microclimate that coaxes roots to explore downward without drowning them. Resist every urge to give a "proper" watering this early. For autoflowering cultivars especially, a waterlogged seedling stage is nearly impossible to fully recover from, their fixed timeline simply doesn't allow it.
Vegetative Stage: Build the Wet-Dry Cycle
Once your plants have developed three to four nodes and you're clearly into the vegetative stage, their water demands ramp up quickly. Leaf area expands, transpiration accelerates, and the root system extends into previously untouched areas of the medium. You'll want to read our full resource on what to expect during the vegetative stage to align your entire feeding programme with this surge in growth.
Now is the time to establish the wet-dry cycle that will carry you through to harvest. Water thoroughly — until you see 10 to 20% runoff from the drainage holes, then allow the medium to dry almost completely before watering again. This cycle does two critical things simultaneously: it ensures complete root-zone saturation with every watering, and it forces roots to extend deeper into the pot in search of moisture between sessions. Deeper roots mean a structurally stronger plant with greater drought resilience later.
Flowering Stage: Peak Demand, Precision Timing
Flip your lights to 12/12, or watch your autoflower transition on its own schedule, and within a week or two you'll notice your plants are drinking considerably faster. All available metabolic energy is now directed toward bud development, and that process is extraordinarily water-intensive.
Professional data from the Emerald Growers Association puts average water application in full flower at 4.5 litres per day for every 500 grams of expected processed yield. That's a meaningful number. If you're projecting a 500 g harvest from a robust feminised photoperiod plant, plan for roughly 4.5 L daily during peak flower — though soil growers typically deliver this as a thorough soak every two to three days rather than a daily top-up. During this phase, staying on top of nutrients is equally critical, since water uptake drives nutrient transport throughout the plant.
As you approach harvest — typically the final one to two weeks, begin tapering your water volume. Reduce the amount per session while allowing slightly more dry time between waterings. This focuses the plant's terminal energy on ripening rather than vegetative processes, and it makes trimming noticeably easier.
Autoflower vs. Feminised: A Direct Comparison
Autoflowering and photoperiod feminised cultivars share the same basic growth stages, but their watering needs diverge in important ways. For a comprehensive look at working with short-cycle genetics, our full guide on growing autoflower cultivars is essential reading.
| Cultivar Type | Typical Pot Size | Vegetative Watering | Flowering Watering | Key Consideration |
|---|---|---|---|---|
| Autoflower | 2–4 gallons | Conservative; small root systems are highly overwatering-sensitive | Drinks heavily but over a compressed flowering window | Extremely sensitive to overwatering in weeks 1–3; stunted growth cannot be remedied by extending veg |
| Feminised (Photoperiod) | 5–7+ gallons | Scales up significantly as canopy and root mass develop | High and sustained consumption, peaking in weeks 5–8 of flower | More forgiving of minor scheduling errors due to larger root mass and adjustable veg duration |
Always treat these as starting parameters, not absolutes. A compact autoflower under a modest LED in a cool Canadian basement will need far less water than a sprawling feminised plant running under a 1,000 W HPS in a hot tent at 28°C and 45% RH.
Reading Your Plant: Overwatering vs. Underwatering
Cannabis communicates its stress through leaves. Learning to interpret those signals quickly is the difference between a minor correction and a weeks-long recovery.
Signs of Overwatering
An overwatered plant looks heavy. Bloated, even. The leaves droop downward from the petiole, but crucially they feel firm and turgid to the touch — sometimes curling under at the edges, like a cupped hand. This firmness is the key distinguishing feature. The cells are full; the plant isn't wilting from thirst, it's drowning in excess moisture.
Check the medium. If the top two inches are still wet 72 hours after your last watering, you've watered too soon. Look also for yellowing lower leaves, which can indicate early nutrient lockout triggered by oxygen-starved roots. When leaves start curling downward with that firm, swollen quality, overwatering is almost always the culprit.
Signs of Underwatering
Underwatered plants look sad rather than swollen. The leaves droop limply, feeling thin, dry, and almost papery between your fingers. The entire plant may look wilted, and the medium will be pulling away from the sides of the pot — a reliable visual cue that it has contracted as it dried. The pot will feel nearly weightless.
Underwatering, while dramatic in appearance, is generally far easier to remedy than overwatering. A slow, thorough soak — applied in two passes if the medium initially repels water, will typically revive a wilted plant within two to four hours.
Correcting Watering Problems
For overwatering:
- Stop watering immediately and allow the medium to dry completely — no shortcuts.
- Direct a fan toward the base of the plant to increase airflow around the pot and accelerate evaporation.
- If using fabric pots, briefly elevate them to improve air circulation under the base.
- Resume watering only when the lift test and finger test both confirm the medium is dry.
- Consider whether your pot size is appropriate — plants in oversized containers are chronically prone to overwatering.
For underwatering:
- Water slowly in a circular pattern around the plant, allowing the medium to absorb before adding more.
- If the medium is severely dry and hydrophobic, give a smaller initial soak, wait 20 minutes, then follow with a fuller watering to achieve 10–20% runoff.
- Monitor recovery within 2–4 hours; healthy plants rebound quickly once the root zone is rehydrated.
Water Quality, pH, and the Flushing Question
The water you deliver matters as much as when you deliver it. Two quality variables — chlorine content and pH, have an outsized impact on root-zone health and nutrient availability.
Canadian municipal tap water is generally safe for cannabis, but it routinely contains chlorine or chloramines. Chlorine dissipates readily: fill your watering vessel and let it sit uncovered for 24 hours before use. Chloramines, used in many Canadian cities as a more stable alternative, don't off-gas as easily and may require a campden tablet or an activated carbon filter to neutralise. Check your local water treatment report — most municipalities publish this data publicly.
pH is non-negotiable. Cannabis grown in soil performs optimally when water pH is maintained between 6.0 and 7.0, with 6.2 to 6.8 being the sweet spot for most macronutrient and micronutrient availability. Coco coir and hydroponic systems want a narrower band of 5.5 to 6.1. Drifting outside these ranges triggers nutrient lockout — deficiency symptoms that no amount of feeding will correct until the pH is addressed. A reliable pH pen and a bottle each of pH Up and pH Down are non-negotiable investments.
Over multiple watering cycles, mineral salts from fertilisers and hard water accumulate in the medium and progressively shift the pH downward while creating antagonistic nutrient interactions at the root surface. Running 10–20% runoff with every watering helps slow this buildup significantly. A dedicated flush with plain, pH-adjusted water every three to four weeks — or whenever you observe unexplained nutrient deficiency symptoms, resets the root zone and restores proper availability. Always remove runoff water from saucers promptly; sitting water at the base of your pot is an open invitation for root rot and fungus gnats.
Watering first thing in the morning — right when your lights come on or at sunrise for outdoor plants, gives the entire active photoperiod for the plant to transpire moisture through its leaves. This prevents the cold, stagnant dampness that invites mould and mildew during the dark cycle. It's a small habit that pays meaningful dividends, especially in the dense canopy conditions typical of late flower.
FAQs
Can I Use Regular Tap Water?
Yes, with two straightforward adjustments. First, fill your watering vessel and leave it uncovered for a full 24 hours to allow chlorine to off-gas. Second, test and adjust the pH before every watering. Cannabis in soil is happiest when the water's pH falls between 6.0 and 7.0. A basic pH testing kit costs under $20 at most garden centres, and pH Up or pH Down solutions let you dial in your target precisely. This single habit — checking pH every time, will prevent the majority of nutrient deficiencies that perplex new growers.
How Does Watering Change for Autoflower Cultivars?
Autoflowering genetics, the ruderalis-influenced cultivars that Pacific Seed Bank has built much of its catalogue around, are particularly unforgiving of early overwatering. A photoperiod feminised plant that gets waterlogged in week two can recover by extending its vegetative period. An autoflower cannot — it's on a fixed genetic timeline regardless of environmental stress. Any growth suppression in the first three weeks translates directly to a smaller final plant and a lighter harvest, with no opportunity to make it up later. Lean heavily on the lift test and finger test with autos, especially before week four. When in doubt, wait another day.
Should I Water Until I See Runoff?
For soil and coco growers, yes — targeting 10 to 20% runoff with each watering session is excellent practice. It accomplishes two things: it guarantees that the entire root zone has been saturated with no dry pockets remaining at depth, and it progressively flushes excess nutrient salts from the medium before they can accumulate to problematic levels. Elevated salt concentrations tighten up the root-zone pH and compete with nutrients your plant is actively trying to absorb. Runoff keeps the slate clean. Just never allow your pots to sit in collected runoff, drain saucers immediately after every watering session.
What Time of Day Is Best for Watering?
Water at the start of your plants' active period — the moment your grow lights turn on, or early morning for outdoor cultivation. This gives the plant the entire photoperiod to metabolise that water through photosynthesis and transpiration, and it allows surface moisture and leaf wetness to evaporate naturally before temperatures drop and lights go off. Watering or during the dark cycle, creates cool, humid conditions at the root zone and leaf surface that are ideal for powdery mildew and other fungal pathogens. Timing costs nothing and reduces disease pressure meaningfully.
Watering well is ultimately a discipline of observation. The growers who consistently produce dense, resin-drenched harvests aren't following a tighter schedule than everyone else — they're paying closer attention to what their plants are saying between waterings. Apply the lift test and finger test daily, dial in your medium and pot combination for your specific environment, calibrate your approach to each growth phase, and keep your water's pH in range every single time. Do those things consistently and your plants will reward you with the kind of results that make the effort worthwhile.
Ready to put this into practice with genetics worth growing? Explore our full catalogue of autoflowering and feminised cultivars at https://pacificseedbank.ca, and find in-depth cultivation resources for every stage of your grow in our Growing Marijuana blog.
Keep Reading

How Much Does It Cost To Grow Your Own Weed in Canada?
Learn the real costs of growing weed at home, including grow tents, lights, seeds, nutrients, electricity, and how much cannabis you can harvest.

The 5 Best Blueberry Cannabis Strains To Grow Indoors
Find the best blueberry weed strains to grow indoors, including Blue Dream, Blueberry Cheesecake, and more - and buy the seeds from Pacific Seed Bank.

Why 5.8–6.5 Is The Ideal pH for Cannabis (And When to Adjust)
Learn why 5.8-6.5 is the ideal pH for cannabis plants, how to test your plant's pH, and how to adjust it higher or lower when you need to.

The Best Autoflowering Light Schedule For Bigger Yields
Stop guessing your autoflowering light schedule. Our guide breaks down the 18/6, 20/4, and 24/0 schedules to help you grow bigger, better plants.