How to Prune Weed The Right Way for Bigger Yields
· 17 min read · Updated May 14, 2026
A single, well-timed snip can redirect weeks' worth of accumulated plant energy in an instant — and that one cut is often the difference between a canopy that underperforms and one that leaves you genuinely speechless at harvest. Pruning is not gardening housekeeping. It is precision cultivation strategy, and understanding why it works at the physiological level will change the way you approach every grow from here forward.
Why Pruning Weed Is a True big shift for Your Canopy
Most new growers assume that a bigger, leafier plant is automatically a healthier, more productive one. The reality is exactly the opposite. An unpruned cannabis plant is a study in inefficiency: large fan leaves cast deep shadows over developing bud sites, lower branches produce nothing but airy "popcorn" buds that barely register on the scale, and stagnant pockets of humid air gather inside a crowded canopy, inviting mould and mildew to take hold.
Pruning corrects all three problems at once.
By removing unnecessary leaves and underdeveloped lateral branches at the right moments, you are not harming your plant — you are coaching it. You are telling it, with surgical clarity, exactly where to send its photosynthate. The plant has a finite energy budget. Every gram of sugar it sinks into a shaded, light-starved popcorn bud at the bottom of the canopy is a gram that never makes it to the dense, resin-drenched top colas you are actually growing for.
Here is what a well-executed pruning strategy accomplishes in practical terms:
- Deeper light penetration: Removing strategically placed fan leaves allows photons to reach bud sites two, three, even four nodes below the canopy surface — sites that would otherwise be permanently in the dark.
- Improved vapour pressure dynamics: Better airflow through an open canopy keeps VPD (vapour pressure deficit) in the optimal 0.8–1.2 kPa range during flower, directly reducing disease pressure.
- Concentrated auxin flow: When you remove apically dominant growth or competing lateral shoots, the plant's auxin and cytokinin signalling reorganises around your intended primary bud sites, fattening them faster.
- Cleaner harvest: Plants with thinned canopies produce fewer, denser, more uniformly ripened colas — easier to trim and cure with precision.
This focus on quality over quantity is what separates a decent harvest from an extraordinary one.
Pruning is a genuine big shift for home growers, and the market data backs that up: the global cannabis cultivation sector is projected to surge from $59.63 billion in 2025 to $188.83 billion by 2032, driven in no small part by cultivators who have learned to maximise yield per square metre rather than simply adding more plants. In the U.S., the legal cannabis market alone reached $45.3 billion in 2025. In that environment, yield optimisation techniques that cost nothing but knowledge — pruning chief among them, are among the highest-ROI skills a grower can develop.
Combined with efficient spacing strategies, pruning unlocks even more potential. If you are growing indoors, pairing it with knowledge of Sea of Green methods compounds the benefit considerably, allowing you to run a tight, productive canopy with minimal wasted light. Our Growing Marijuana resource library covers both in depth.
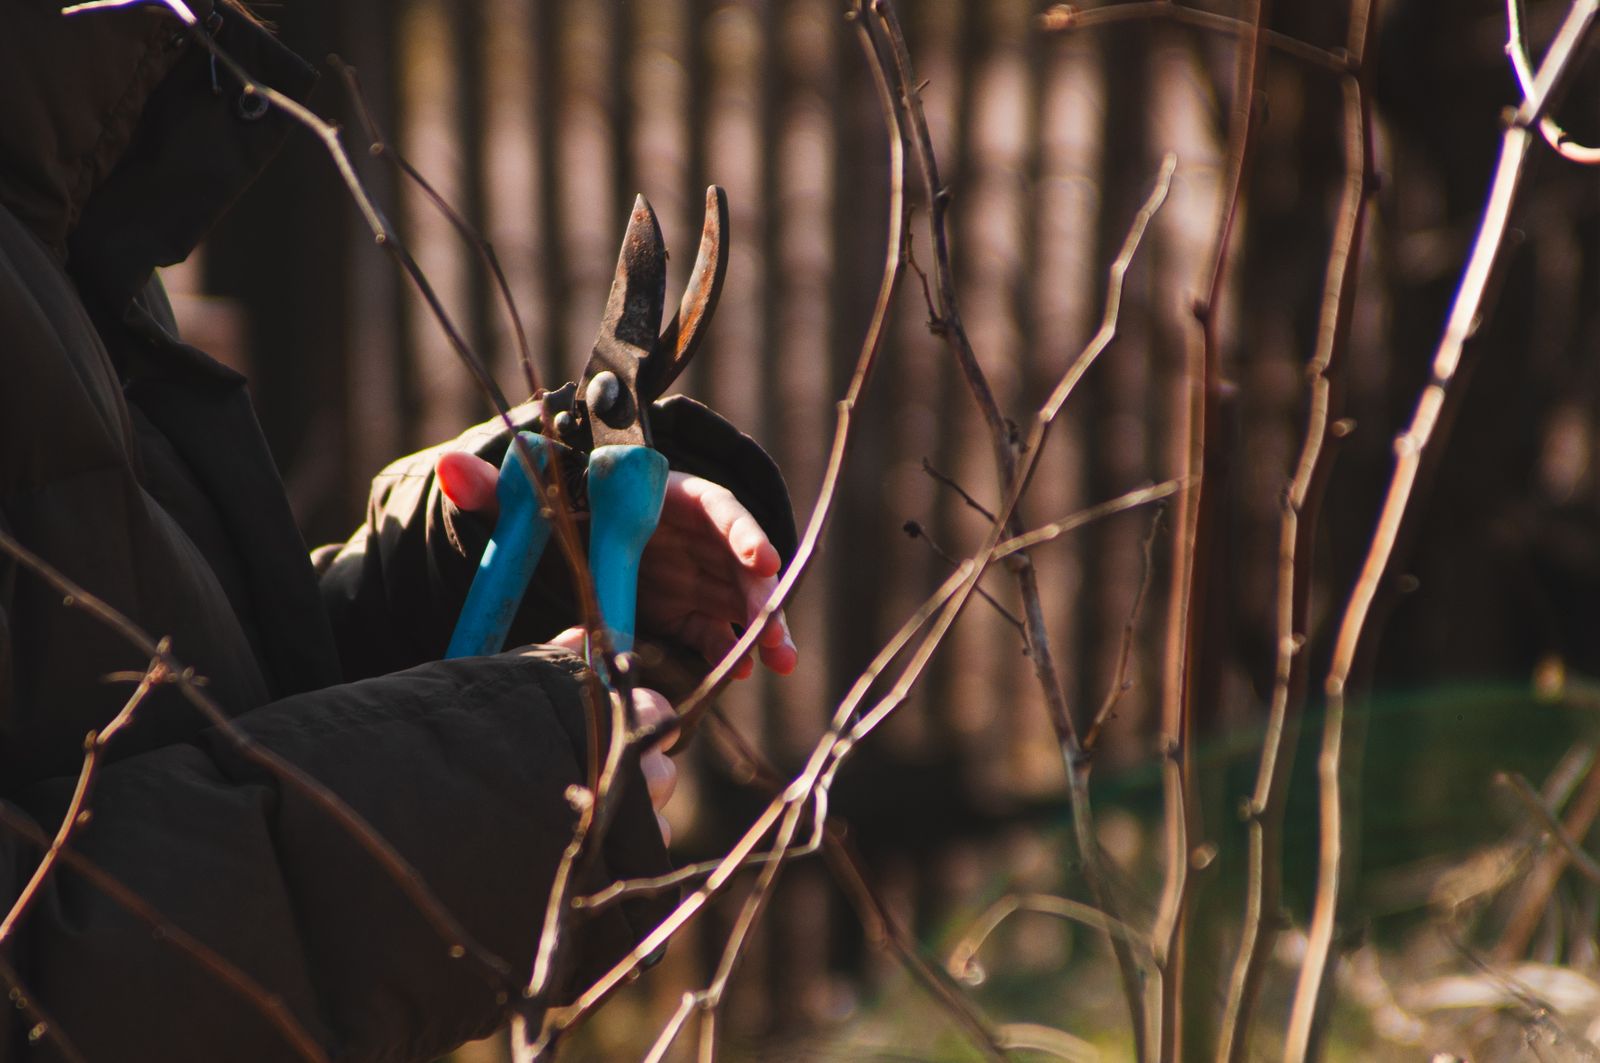
Choosing and Maintaining the Right Pruning Tools
You would not perform precision surgery with a rusted butter knife. The same logic applies here.
The good news: your toolkit does not need to be expensive. What it does need to be is sharp, clean, and appropriate for the task at hand. Dull blades crush plant tissue instead of cutting it, leaving ragged wounds that take far longer to heal and create entry points for pathogens. Dirty blades are even worse — they are pathogen delivery systems dressed up as tools.
Selecting Your Shears
Two styles cover virtually every pruning task you will encounter:
- Spring-loaded bypass pruning shears: The workhorse for thicker branches and longer sessions. The spring-return mechanism dramatically reduces hand fatigue when you are trimming multiple plants in a single session. Look for stainless steel blades with a bypass (scissor-action) rather than anvil design — bypass cuts cleanly rather than crushing.
- Micro-snips or bonsai scissors: Indispensable for working in tight spaces without accidentally nicking a nearby bud or severing a stem you meant to keep. The narrow profile gives you a level of surgical control that full-size shears simply cannot match during defoliation.
Owning both is the ideal setup. Use the shears for heavier structural work — topping, lollipopping, removing thick lateral branches, and switch to the micro-snips for precise fan-leaf removal and detail work around bud sites.
Sterilisation Is Non-Negotiable
Wipe every blade with isopropyl alcohol (70% or higher) before you make the first cut of the session, and again between every plant. It takes ten seconds. Those ten seconds can prevent a bacterial or fungal infection from travelling through an entire crop.
Cannabis plants pruned with sterile tools heal rapidly — a clean wound on a healthy plant forms a dry callus within 24–48 hours. The same wound made with a contaminated blade can become a festering entry point for botrytis, fusarium, or any number of bacterial rots. Stainless steel blades are the best investment here: they clean easily, resist corrosion, and hold an edge through many seasons of use with occasional sharpening.
Do not be seduced by expensive branded "cannabis-specific" tools. A quality pair of stainless bypass shears from any reputable horticultural supplier, kept clean and sharp, will outperform a flashy overpriced set that never gets sterilised.
Topping: Breaking Apical Dominance to Build a Better Structure
Topping is the single highest-impact pruning technique available to a cannabis grower. It sounds dramatic — you are, after all, cutting off the top of your plant, but the effect it produces is transformative.
An unpruned cannabis plant expresses strong apical dominance: a genetically encoded tendency to prioritise vertical growth on one central main stem, flooding that stem with growth hormones while keeping lateral branches suppressed. The result is the classic "Christmas tree" silhouette — tall, narrow, with a single dominant cola and a tapering skirt of increasingly unproductive lower branches. That structure is optimised for outdoor survival. It is terrible for indoor yield.
When you remove the apical tip, you sever the source of the auxin signal that enforces that dominance. The plant's hormonal architecture shifts. Cytokinins, which promote lateral branching, flood the nodes just below the cut. Two new main shoots emerge where one existed before. Top those in turn, and you have four. Four becomes eight. Within a few cycles, you have built a wide, even canopy of multiple dominant colas — all receiving similar light intensity, all pumping out comparable bud production.
This is not a new trick. Topping has been standard practice since the Dutch breeding revolution of the 1970s and is employed in roughly 90% of commercial indoor operations today. Yield data from grows across North America consistently shows topping alone can increase usable flower by up to 50% compared with untopped plants of the same cultivar in identical conditions.
When and How to Top
Timing determines whether topping is a gift or a setback. Top too early and you stress a fragile seedling that lacks the root mass to recover quickly. Top too late and you lose time that could have been spent building out that bushy structure.
The window opens once your plant has established a solid root system and produced four to five sets of true leaves (nodes) — typically three to five weeks after germination under healthy conditions. At this stage, the plant has the metabolic reserves and foliar surface area to absorb the stress and redirect its energy with minimal delay.
- Identify the cut site. Locate the newest, smallest set of leaves at the very tip of the main stem. Your cut will be made on the stem just above the node directly below this apical growth — not through the node itself.
- Execute cleanly. One decisive cut with sharp, sterile shears. Leave approximately 5–6 mm of stem above the side shoots at that node. This short stub acts as a protective buffer, preventing the newly forming twin main branches from splitting under their own weight as they develop.
- Observe and wait. Resist the urge to immediately water, feed, or fuss. Let the plant sit undisturbed for 24 hours. Within three to seven days, you will see the two lateral branches at the cut site surge upward with remarkable vigour, becoming your new co-dominant colas.
- Repeat if desired. Once those two new tops have each developed two to three nodes of their own healthy growth, you can top each of them to double the colas again. Most home growers find two to three rounds of topping sufficient to build a productive eight- to sixteen-cola structure.
Every cut is a form of managed stress. The plant's recovery speed is the signal you are watching for. Healthy new growth after a topping means you can proceed. Slow, pale, or stunted recovery means the plant needed more time before you intervened.
One critical caveat: topping is a high-stress technique (HST) suited to photoperiod feminised cultivars, which are in the vegetative stage for as long as you maintain an 18/6 light schedule. If stress slows recovery, simply extend the vegetative phase by a week or two before flipping to flower. That flexibility is a luxury autoflowers do not have — which brings us to the next point.
Defoliation and Lollipopping: Fine-Tuning for Maximum Flower Production
If topping builds the architecture, defoliation and lollipopping finish the design. These two complementary techniques work on what the plant already has, optimising every node you have spent weeks developing.
Defoliation: Opening the Canopy to Light and Air
Cannabis fan leaves are the plant's photosynthetic engine. In the right quantity, they are essential. In excess, they become a liability — casting dense shade across the very bud sites they are supposed to be feeding.
Strategic defoliation removes the largest, most problematic fan leaves: primarily those in the crowded interior of the plant that are blocking light from reaching nodes below, and those sitting flat across the top of the canopy like solar panels competing with the bud sites directly beneath them.
The dual benefit is measurable. In high-density indoor grows, disciplined defoliation has been shown to increase harvestable flower by 25–40% while reducing canopy humidity by approximately 20% — a meaningful reduction in mould and mildew risk that becomes especially significant in the final weeks of flowering when dense, resinous buds are most vulnerable.
After a heavier defoliation session, your plant may look unsettlingly bare. Trust the process. Within a few days the remaining bud sites will visibly swell in response to the increased light and resource availability. If you notice any unusual discolouration or structural abnormalities post-trim, brush up on how to diagnose common weed leaf issues so you can rule out any underlying deficiencies or infections.
Lollipopping: Concentrating Energy at the Top
Lollipopping takes the logic of defoliation and applies it to the plant's entire lower third. The goal is exactly what the name suggests: a clean bare stem rising to a productive crown of foliage and bud sites, like a lollipop.
The lower branches of a cannabis plant — those sitting below the main canopy, receive a fraction of the light intensity that the upper canopy enjoys. Light intensity drops off sharply with distance; a bud site receiving 200 µmol/m²/s at the bottom of the canopy will never approach the trichome density of one receiving 800 µmol/m²/s at the top. Those lower sites are energy sinks. They consume resources while contributing minimally to final yield.
Removing the bottom third of the plant redirects that energy to the main colas, where it genuinely matters. Some research suggests this focus on the primary flower sites can produce up to a 15% improvement in measurable cannabinoid density in those colas by allowing them to fully express their genetic potential.
The best timing for a combined defoliation and lollipop session is at the transition point between the vegetative stage and the first one to two weeks of flower. The plant is establishing its final structure, committing to bud-site positions, and — critically, still has the metabolic vigour to recover from a significant trim before it locks in to full flower production.
When you are ready to lollipop, work methodically:
- Start from the base. Strip all growth — branches, bud sites, fan leaves — from the bottom third of each main branch. Be decisive. If it is not receiving direct light, it is not earning its keep.
- Thin the interior. Move through the middle canopy and selectively remove large fan leaves that are visibly shading multiple bud sites below. Target the biggest light-blockers first.
- Respect the 20–30% rule. Never remove more than about 20–30% of total foliar mass in a single session. This preserves enough photosynthetic capacity for rapid recovery while still achieving meaningful canopy restructuring. If you need to remove more, schedule a follow-up session two to three days later.
Give your plant 48–72 hours of undisturbed recovery after a major trim. The acceleration in upper bud development that follows is one of the most satisfying sights in cultivation.
Pruning Autoflowers Versus Photoperiod Cultivars: The Rules Are Different
This distinction cannot be overstated. Applying photoperiod pruning logic to autoflowers is one of the most common and costly mistakes home growers make.
Photoperiod feminised plants — the classic cannabis cultivars that require a shift to a 12/12 light schedule to trigger flowering, are remarkably forgiving training subjects. They remain in the vegetative stage for as long as you maintain extended light hours, which means that if you over-prune and stress the plant, you simply give it another one to two weeks of vegetative recovery time before flipping. The plant resets, you adjust, and the harvest timeline shifts accordingly. No permanent damage done.
Autoflowers operate on a completely different biological contract. They flower on an internal clock, not a light schedule — typically commencing flower initiation six to eight weeks after germination regardless of what you do with the lights. That internal timer does not pause for pruning stress.
The Autoflower Timeline Problem
If you top or heavily defoliate an autoflower and it enters a stress-recovery stall, those lost days cannot be reclaimed. The plant will begin flowering on schedule whether or not it has fully recovered, often locking in a stunted structure that delivers a fraction of its potential yield. There is no "add a week of veg" escape hatch.
This means the calculus around pruning autoflowers is fundamentally different. High-stress techniques like topping are achievable with autoflowers — experienced cultivators do it successfully, but the margin for error is razor-thin. The technique must be executed at precisely the right developmental stage (typically after node three, before node five), on a vigorously healthy plant, with zero pre-existing stress. For most growers, particularly those still developing their reading of plant signals, the risk-to-reward ratio simply does not justify it.
The guiding principle for pruning autoflowers is less is more. Your goal is to gently improve light distribution and airflow without triggering a stress response the plant does not have time to recover from.
For those growing autos, low-stress canopy management is the smarter path:
- Leaf tucking: The gentlest available intervention. Rather than removing fan leaves that are blocking light, you simply tuck them beneath the developing bud sites below. No wounds, no healing time required, meaningful improvement in light distribution. Do this regularly as the plant fills in.
- Selective minimal defoliation: Limited to removing the occasional large fan leaf that is casting substantial shade over multiple bud sites, and clearing clearly yellowing or dying leaves at the base. Never exceed five to six leaves removed per session on an autoflower.
- Restrained lollipopping: If you feel the lowest branches are clearly non-productive and will not reach the light, you may remove the smallest two or three. Do not strip the entire lower third as you would on a photoperiod plant.
Think of autoflower canopy management as light housekeeping rather than structural renovation. The contrast in approach is stark, and understanding it is fundamental to success with either plant type. Our detailed guide on autoflowering vs photoperiod cultivars provides the full biological context behind these differences.
Common Pruning Mistakes That Cost You Yield
Knowing what to do is only half the equation. Knowing what not to do protects the work you have already invested.
Over-Pruning in a Single Session
The most common and most damaging mistake. The impulse is understandable — you have the shears in hand, the plant in front of you, and you want to optimise everything at once. Resist it. Removing too much foliage in a single session triggers a stress response that can stall growth for days or weeks, and in autoflowers, that stall can be permanent in its effect on final yield.
The 20% rule is the professional standard: remove no more than approximately one-fifth of your plant's total foliar mass per session. When in doubt, take less. You can always return in two to three days and remove additional material. You cannot un-cut a leaf that the plant needed.
Pruning at the Wrong Stage
Cannabis plants have pruning windows. Outside those windows, the same cut that would have been beneficial becomes a setback.
- Seedling stage: A plant with fewer than three full sets of leaves has minimal photosynthetic capacity and a fragile root system. Any pruning at this stage removes resources the plant cannot afford to lose. Wait.
- Late flowering (weeks five through harvest): Once bud development is well underway and the plant has committed its energy to ripening, significant pruning forces it to divert resources to wound repair at precisely the moment those resources should be flowing exclusively into trichome production. A light clean-up of clearly dead or dying material is acceptable; anything beyond that hurts your final weight and quality.
The productive windows are: mid-to-late vegetative phase for topping and structural pruning; early flower (weeks one to two) for a final defoliation and lollipop session. Stick to those windows and you work with the plant's natural hormonal rhythm rather than against it.
Using Dirty Tools
A pruning shear that has not been sterilised between plants is not a tool — it is a pathogen shuttle. Bacterial infections, botrytis spores, fusarium, and viral particles can all travel on an unsterilised blade from a compromised plant to a healthy one.
The fix is trivially simple: isopropyl alcohol, applied to the blade before the first cut and between every plant. A clean cut on a healthy plant closes and calluses in 24–48 hours. A contaminated cut on the same healthy plant can open the door to infections that destroy an entire crop. Ten seconds of sterilisation per plant is among the highest-value habits you can build as a cultivator. Build it now, keep it always.
FAQs
How Soon Can I Start Pruning My Plant?
Patience is the most underrated pruning tool. Your plant is not ready for any significant intervention until it has developed a strong root system and produced at least three to five sets of true leaves — a milestone that typically arrives three to four weeks after germination under healthy conditions. Before that point, every leaf on the plant is a critical resource the seedling cannot afford to spare.
For topping specifically, waiting until the fourth or fifth node is the professional standard. That foundation gives the plant sufficient metabolic reserves to absorb the stress of the cut and respond with the vigorous lateral growth you are looking for. You can begin very light maintenance earlier — removing the occasional yellowing lowest leaf, for example, but save any meaningful structural work until the plant is properly established in the vegetative stage and visibly thriving.
Will Pruning Increase Potency or Just Yield?
Both, though through different mechanisms and to different degrees. The yield effect is direct and well-documented: more colas, more light reaching bud sites, more energy concentrated where it produces harvestable flower. The potency effect is indirect but real.
Trichomes — the resin glands that produce cannabinoids and terpenes, develop most densely and completely on bud sites that receive high-intensity direct light. By opening the canopy through strategic defoliation, you expose more bud sites to that intensity. Better light exposure supports fuller trichome development across a greater surface area of the plant. Genetics remain the primary determinant of maximum THC percentage and terpene profile, but pruning helps each plant reach closer to its genetic ceiling rather than falling short of it.
What Happens If I Prune During the Flowering Stage?
The answer depends entirely on timing and scale. Heavy pruning — topping, aggressive defoliation, lollipopping, during established flower production causes significant stress at the worst possible moment, forcing the plant to divert energy from bud development to wound repair. Avoid it.
Light defoliation in the first two to three weeks of flower, however, is a well-established and widely recommended technique. A careful, selective removal of the largest canopy-blocking fan leaves at this early stage improves light penetration and airflow as the bud sites begin their most rapid growth phase. Many experienced growers consider this the most important defoliation session of the entire grow. After week three of flower, put the shears away entirely and let the plant direct every available resource toward ripening.
At Pacific Seed Bank, we believe that elite technique applied to elite genetics is what separates a memorable harvest from a forgettable one. With over 1,400 feminised and autoflowering cultivars in our catalogue — including vigorous, high-yielding varieties purpose-built for Canadian growing conditions, you have access to the genetics that respond most dramatically to every pruning strategy covered here. Whether you are training your first photoperiod feminised plant or dialling in a minimal-intervention approach for a fast autoflower run, the tools and knowledge above will serve every grow. Put in the work at the canopy, and your plants will repay you with the kind of harvest that makes all those careful snips entirely worth it.
Keep Reading

How Much Does It Cost To Grow Your Own Weed in Canada?
Learn the real costs of growing weed at home, including grow tents, lights, seeds, nutrients, electricity, and how much cannabis you can harvest.

The 5 Best Blueberry Cannabis Strains To Grow Indoors
Find the best blueberry weed strains to grow indoors, including Blue Dream, Blueberry Cheesecake, and more - and buy the seeds from Pacific Seed Bank.

Why 5.8–6.5 Is The Ideal pH for Cannabis (And When to Adjust)
Learn why 5.8-6.5 is the ideal pH for cannabis plants, how to test your plant's pH, and how to adjust it higher or lower when you need to.

The Best Autoflowering Light Schedule For Bigger Yields
Stop guessing your autoflowering light schedule. Our guide breaks down the 18/6, 20/4, and 24/0 schedules to help you grow bigger, better plants.