A Guide to the Cannabis Vegetative Stage
16 min read · , updated May 14, 2026
Most growers lose their biggest harvests not in flower, not at harvest, and not during cure — but during the vegetative stage, when every structural decision your plant will ever make gets locked in. The veg phase is not a waiting room. It is the foundational engineering phase of your entire grow, and the growers who treat it that way are the ones pulling down 600 g/m² instead of 250.
Here is everything you need to know to make the most of it.
What the Weed Vegetative Stage Actually Is
The vegetative stage begins the moment your seedling graduates from its fragile, cotyledon-sporting early life and starts producing true serrated leaves. From that point until you trigger flowering, your plant has one singular biological mission: build infrastructure.
That infrastructure has three components, and each one directly determines your eventual yield ceiling.
- Root system: The larger and more developed the root zone, the more water and nutrients the plant can pull per hour — a direct multiplier on every growth process that follows.
- Main stem: The stalk must be thick and lignified enough to bear the structural load of dense, resinous colas. Weak stems mean toppled branches and lost yield.
- Leaf and branch architecture: Leaves are photosynthetic engines. Branches are future bud sites. Every node your plant stacks in veg is another potential cola come harvest.
Think of the vegetative stage as building a factory before you start production. The bigger and more efficient that factory, the more it can produce once it gets the signal to shift into flowering mode.
Photoperiod vs. Autoflower: Two Very Different Veg Clocks
At Pacific Seed Bank, we carry both feminised photoperiod and autoflowering cultivars, and how each type moves through the vegetative stage is fundamentally different. Getting this distinction right changes every decision you make downstream.
Photoperiod feminised plants are entirely under your command during veg. You keep them growing vegetatively by running an 18/6 light schedule — 18 hours of light, 6 hours of uninterrupted darkness. As long as that ratio holds, they will not flower. You could, theoretically, veg a photoperiod plant for months. The plant simply does not know when to stop unless the light cycle tells it to.
Autoflowering cultivars operate on a genetic timer instead of a light-cycle trigger. They veg for approximately 3 to 5 weeks from germination — regardless of how many hours of light they receive, and then shift automatically into flower. This makes them extraordinarily forgiving for beginners and ideal for Canadian growers working with compressed outdoor seasons, but it also means the window for training and structural development is tight.
The contrast matters enormously for planning. With photoperiods, you design the veg duration around your space, training method, and yield goals. With autos, the plant sets the schedule and you optimise within it.
Typical Veg Stage Durations by Growing Method
| Cultivar Type or Method | Typical Veg Duration | Primary Goal |
|---|---|---|
| Autoflowers | 3–5 weeks | Reach maximum size before automatic flowering begins |
| Photoperiod (indoors) | 4–8 weeks | Develop solid structure and size for the grow space |
| Sea of Green (SOG) | 2–3 weeks | Keep plants compact to maximise plant density per metre |
| Screen of Green (SCROG) | 8–15 weeks | Fill a horizontal net for a perfectly level canopy |
| Outdoor Grow | 3–6 months | Maximise plant mass through the full spring and summer |
A Sea of Green operator vegging for just three weeks is making a deliberate efficiency play — rapid turnover, many small plants, frequent harvests. A SCROG grower running 12-plus weeks of veg is making the opposite bet: one or two large plants, a perfectly filled net, and enormous individual yield. Neither approach is wrong. They are just different factories producing the same product.
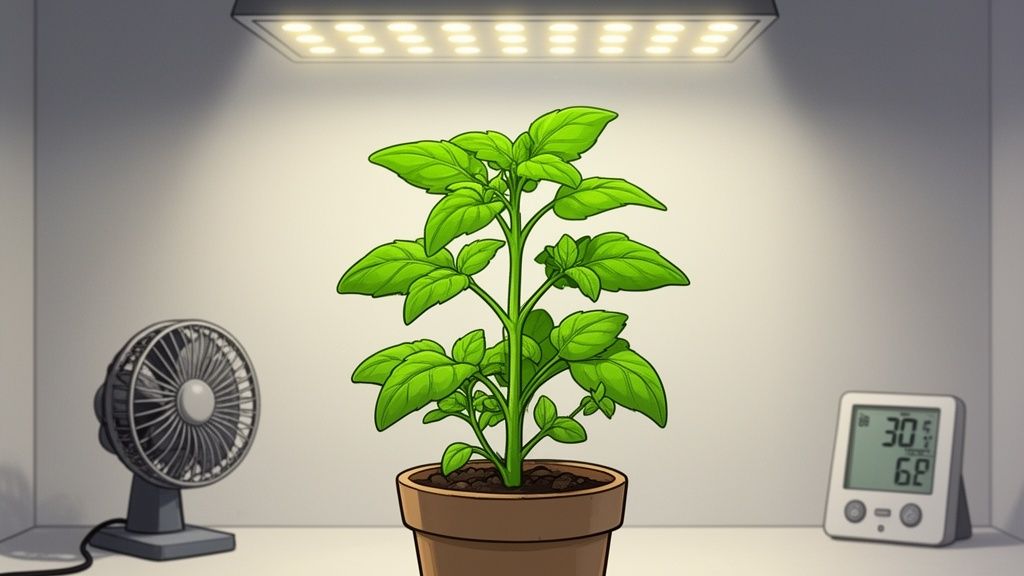
Dialling In Your Environment for Explosive Veg Growth
If the veg stage is your plant's growth spurt, your grow room is its training facility. Every environmental variable either accelerates or constrains how fast and how powerfully your plant builds its structure. Get these parameters right, and you will be amazed at how quickly a cannabis plant can grow — easily 2 to 5 cm per day under optimal conditions.
Light: The Primary Driver of Everything
Light is the engine. During veg, photoperiod plants want 18 to 24 hours of light per day, and the gold standard for most indoor growers is the 18/6 schedule. It delivers enough photosynthetically active radiation for explosive growth while giving both the plant and your equipment a short rest period. It also meaningfully reduces electricity costs compared to running lights around the clock — a relevant consideration given Canadian energy prices.
Some growers run 24/0, particularly for autoflowers or to push photoperiod seedlings through their earliest weeks. The yield gains are real but incremental, and the cost in electricity and equipment wear adds up quickly. For most home cultivators operating under the Canadian Cannabis Act's personal cultivation allowance of four plants per household, 18/6 is the optimal balance.
Autoflowers perform excellently on an 18/6 schedule maintained from seed to harvest, maximising photosynthetic input without the diminishing returns of full 24-hour light exposure.
Temperature and Humidity: The VPD Equation
Cannabis plants are not so different from us — they perform best within a comfortable, stable climate band. Understanding how temperature and humidity interact through Vapour Pressure Deficit (VPD) is what separates hobbyists from consistently high-yield cultivators.
During the vegetative stage, target these parameters:
- Temperature (lights on): 22–26°C. Allow a natural drop of 4–6°C during the dark period to mimic outdoor diurnal cycles and strengthen stems.
- Relative Humidity (RH): 40–60%. Young vegging plants transpire aggressively and benefit from higher humidity at the start of the stage; taper it down gradually as the canopy densens and airflow becomes more restricted.
High temperatures paired with low humidity will stress your plants into transpiration shutdown — you will see leaves curling upward as the plant tries to conserve moisture. Cool temperatures with high humidity invite a far more dangerous problem: powdery mildew and botrytis, which can devastate a canopy in days. The sweet spot is always balance, and a digital thermometer/hygrometer with data logging is genuinely one of the most valuable tools in your kit. For a deeper breakdown by growth stage, our guide on the best temperature for growing weed covers the full picture.
Airflow: The Overlooked Structural Tool
Run a gentle oscillating fan aimed across — not directly at, your canopy, and watch what happens to your stems over two weeks. They thicken. They lignify. They become capable of supporting weight that would snap an air-stagnant plant's branches at the first sign of a heavy bud cluster.
This mechanical stress response, called thigmomorphogenesis, is a free structural upgrade that costs you nothing but the electricity to run a small fan. Airflow also prevents the stagnant, moisture-saturated microclimate that powdery mildew loves to colonise. Two clip-on oscillating fans positioned at different heights, producing a gentle, full-canopy rustle — not a windstorm, is all you need.
Feeding and Watering Through the Vegetative Phase
A cannabis plant in full vegetative growth is metabolically voracious. It is synthesising structural carbohydrates, chlorophyll, and new cellular tissue at a rate that demands a steady, well-calibrated nutritional supply. Getting the feed programme right now is the single most impactful thing you can do for the quality of your bud sites come flower.
The Nitrogen-Forward Nutrient Programme
The three macronutrients — Nitrogen (N), Phosphorus (P), and Potassium (K), appear on every nutrient bottle as an N-P-K ratio. In veg, Nitrogen is unambiguously the star of the show. It is the primary building block of chlorophyll and amino acids, which means it drives every green, leafy structure your plant produces.
Choose a nutrient formula where the N value leads significantly — something in the range of 3-1-2 to 5-2-3 is a common and effective veg ratio. Secondary nutrients (calcium, magnesium, sulphur) and micronutrients (iron, manganese, zinc) matter too, particularly in high-volume grows or when working with purified water that has had minerals stripped out. A cal-mag supplement is standard practice in most serious Canadian grows, particularly those running reverse osmosis water or working in coco coir.
pH: The Gateway to Nutrient Availability
Here is the insight that separates effective growers from frustrated ones: you can have a perfectly formulated nutrient solution and still starve your plant if the pH of the root zone is wrong. Nutrient lockout — where elements are chemically unavailable regardless of concentration, is overwhelmingly a pH problem.
Key Takeaway: Always measure and adjust pH after adding nutrients to your water. The nutrients themselves shift pH, sometimes dramatically. That final reading — not the tap water reading, is what your roots actually experience.
Target ranges by medium:
- Soil: 6.0–7.0, with 6.2–6.8 being the productive sweet spot where the broadest range of nutrients remain soluble.
- Hydro or coco coir: 5.5–6.5, kept tighter because inert media rely entirely on the nutrient solution for mineral supply.
A calibrated digital pH pen — maintained with proper storage solution, is a non-negotiable piece of equipment. Cheap pH drops give you a ballpark. A calibrated pen gives you control.
Watering with Intention
Overwatering kills more cannabis plants than any pest or pathogen. It comes from the right instinct — care and attentiveness, expressed at the wrong frequency. Saturated soil deprives roots of oxygen, creating the anaerobic conditions that root rot pathogens like Pythium require to establish.
The wet-dry cycle is your framework. Water thoroughly — until runoff exits the bottom of the pot, then leave the medium alone until the top 2–3 cm are fully dry to the touch. If you lift the pot and it feels surprisingly light, it is almost time to water. If it still feels heavy, wait another day.
In a well-managed indoor veg environment, this typically translates to watering every two to four days, depending on pot volume, plant size, temperature, and relative humidity. Let the plant tell you. It always will.
Training Techniques That Multiply Your Veg Investment
The vegetative stage is the only time you can fundamentally reshape a cannabis plant's architecture. Every training technique worth knowing must happen during veg — and the payoff in flowering is dramatic. An untrained photoperiod plant will send the majority of its energy to a single apical cola, leaving its lower sites competing in deep shade. Training breaks that hierarchy and distributes productive energy across every bud site you have carefully developed.
Low-Stress Training (LST): Start Here
LST requires no cuts, no wounds, and no recovery time — making it the ideal technique for beginners and the only high-reliability option for autoflowers, whose tight schedules cannot accommodate significant stress responses.
The method is straightforward: bend the dominant main stem laterally and secure it to the rim of the pot or a stake using soft plant ties or pipe cleaners. This disrupts apical dominance — the plant's biochemical tendency to prioritise its topmost growing point, and redistributes auxins (growth hormones) more evenly across all lateral branches. Those lower branches suddenly receive the growth signal they were previously denied, racing upward to fill the space the main stem just vacated.
Continue the process as branches develop, systematically bending and tying to create a wide, flat, multi-topped plant from what would otherwise have been a single Christmas tree. It is remarkable how effective a few bits of soft wire and 15 minutes of attention per week can be.
Topping and Fimming: Multiplying Your Main Colas
Topping is a high-stress technique with a high-reward payoff for photoperiod plants with adequate veg time to recover. Using sharp, sterile scissors or a clean blade, you remove the apical meristem — the very tip of the main stem, cleanly between nodes. The plant responds by activating the two lateral growth points directly below the cut, producing two new main stems where one existed before.
Top those two stems at four to six nodes each, and you have four. Top again, and you have eight. This exponential branching is how growers create the dense, wall-to-wall canopies that SCROG setups are famous for. Make your first cut when the plant has developed four to six nodes, and always allow at least a week of recovery growth before the next high-stress intervention.
Fimming — a name derived from the entirely relatable acronym "F*ck, I Missed", involves removing approximately 75% of the newest growth tip rather than cutting cleanly below it. The damaged, partially removed tip generates a chaotic, four-way branching response instead of the clean two-way split topping produces. It is less predictable but can generate more new tops from a single intervention.
Screen of Green (SCROG): Advanced Canopy Engineering
For growers operating in limited vertical space — a common reality under Canadian residential grows, SCROG is arguably the highest-yield-per-watt technique available. Install a horizontal net or trellis at approximately 40–60 cm above the pot, then train all upward growth back beneath the screen as the plant fills it from below.
The result is a perfectly flat canopy where every bud site is at precisely the same distance from the light source. No shadowed undergrowth. No uneven canopy. Every square centimetre of your grow footprint becomes a productive bud site receiving identical light intensity. The extended veg period required — often 8 to 15 weeks, is the investment that pays that dividend.
Choosing the Right Technique for Your Situation
| Technique | Best For | Difficulty | Primary Benefit |
|---|---|---|---|
| LST | Beginners, autoflowers, all cultivar types | Easy | Reshapes plant architecture with zero recovery downtime |
| Topping | Intermediate growers, photoperiod feminised | Medium | Doubles main cola count with each application |
| FIM | Intermediate growers, photoperiod feminised | Medium | Generates up to four new tops from a single cut |
| SCROG | Advanced growers, limited vertical space | Hard | Maximises light interception across the entire canopy footprint |
A critical note for autoflower growers: confine yourself to LST only. Autos begin flowering at 3 to 5 weeks regardless of their structural state, and high-stress techniques like topping impose a recovery period that eats directly into that already-compressed veg window. Applied gently from about week two, LST is extraordinarily effective on autoflowering genetics and costs the plant nothing in recovery time.
Timing the Flip: When to Trigger Flowering
This is the decision that photoperiod growers build their entire veg strategy around. Flip too early, and your plant doesn't have the structural capacity to support the yield it could produce. Flip too late, and you run out of vertical headroom as the post-flip stretch pushes colas into your light source.
The Half-Height Rule
The most reliable benchmark is this: flip your photoperiod plants to flower when they have reached approximately half the final height your space can accommodate. Most cannabis cultivars — particularly sativa-leaning genetics, will stretch 50% to 100% of their veg height during the first two to three weeks of flowering as they make one final push for the light before committing fully to bud production.
If your tent is 150 cm tall, accounting for pot height and the minimum safe light-to-canopy distance (typically 30–45 cm for LED fixtures), your working canopy height might be 90 cm. Flip at 45 cm, and you have comfortable headroom through the stretch. Flip at 75 cm, and your top colas will be burned by harvest.
Measure Your Space Before You Pop a Seed
The calculation above should happen before germination, not after week six. Measure your usable canopy height, choose cultivars whose typical heights align with that space, plan your training method accordingly, and work backward to a target flip date. Indica-dominant genetics from Afghan or Hindu Kush lineages tend toward compact, manageable heights. Sativa-leaning tropical cultivars can stretch dramatically and may require aggressive SCROG work to stay within a standard tent.
Indoor growers working with standard photoperiod genetics typically find that 4 to 8 weeks of veg hits the sweet spot between plant size, structural development, and space management. Sativa-dominant cultivars that can veg for 10 to 16 weeks in nature benefit from longer indoor veg periods to realise their full structural potential before the flip.
Executing the Flip
The mechanics could not be simpler. Adjust your light timer from 18/6 to 12/12 — 12 hours of light, 12 hours of complete, uninterrupted darkness. That uninterrupted darkness is critical; even a brief light leak during the dark period can confuse the plant's photoperiodic response and, in severe cases, trigger hermaphroditism. Seal your tent, tape over any LED indicator lights, and confirm your timer is working correctly before you commit.
Within 7 to 14 days of the flip, you will see the first pre-flowers emerge at the nodes — small, teardrop-shaped pistillate structures on your feminised plants. The factory has received the signal. Production is beginning.
Diagnosing and Solving Common Veg Stage Problems
Even in a well-managed grow, issues arise. The growers who consistently produce excellent results are not the ones who never encounter problems — they are the ones who identify problems early and respond before minor stress becomes catastrophic damage. A daily five-minute walkthrough of your grow space is worth more than any piece of equipment you can buy.
Pests: Spider Mites and Fungus Gnats
Two pests dominate the veg-stage pest conversation, and both are manageable if caught early.
- Spider mites colonise the undersides of leaves, leaving a stippled pattern of tiny white or yellow punctures where they pierce the cellular tissue to feed. Fine webbing between stems and leaves signals a heavy infestation that needs immediate attention. They thrive in hot, dry conditions — another reason to keep your temperature and humidity dialled in.
- Fungus gnats look like tiny fruit flies hovering around your growing medium. The adults are largely cosmetic nuisances, but their larvae hatch in the top layer of moist soil and feed on fine root hairs, creating entry points for pythium and other root pathogens. Letting your topsoil dry more thoroughly between waterings is the most effective cultural control.
For both pests, neem oil — an organic, cold-pressed extract of the neem tree, applied as a foliar spray during the lights-off period is highly effective and introduces no synthetic chemistry into your growing environment. Insecticidal soap is an equally gentle and effective option for soft-bodied insects like mites.
Environmental Stress Symptoms
Your plants communicate their environmental discomfort visibly. Heat stress in a hot, dry room causes leaves to cup upward along their margins — a protective response to reduce the surface area exposed to desiccating conditions. If you are seeing leaves curling in this way, check your temperature and vapour pressure deficit first. Drooping, uniformly limp plants that do not perk up overnight almost always indicate overwatering and impaired oxygen availability at the root zone.
Fix the environment first, before adjusting nutrition. Most apparent nutrient symptoms in veg are actually pH or moisture-management problems wearing nutritional masks.
Nutrient Burn and Flushing
Nutrient burn is the most common feeding error in the veg stage, and it is almost always the result of overfeeding rather than underfeeding. The symptom is distinctive and unmistakable: leaf tips turn dark, then dry and crisp, progressing inward from the margin as severity increases. If you catch it early — tips only, no necrosis extending beyond the first few millimetres, simply reducing your nutrient concentration at the next feeding is often sufficient.
If burn is progressing, or if you are seeing it alongside other symptoms of salt accumulation, it is time to flush the growing medium. Run two to three times the container volume of pH-balanced water through the medium to dissolve and displace accumulated nutrient salts. Allow the medium to partially dry before resuming feeding, and return at 50 to 75% of your previous nutrient concentration.
Start low and increase gradually. Cannabis plants in veg will tell you — through colour, growth rate, and vigour, exactly when they want more food. Chasing deficiencies is far easier than recovering from toxicity.
FAQs
Can You Veg a Plant for Too Long?
Technically, no — a photoperiod plant will remain in the vegetative stage indefinitely as long as it receives 18 or more hours of light per day. Longer veg means a larger structural frame, and a larger frame generally supports a heavier harvest. The practical constraint is always space. A plant that exceeds your tent's vertical capacity will suffer light burn at the apex; one that grows too wide will collapse your airflow and create humid microclimates where mould thrives. Design your veg duration around your space first, your yield goals second.
How Do You Tell If a Vegging Plant Is Healthy?
A thriving plant in veg is unmistakable once you know what to look for. Here is a practical checklist:
- Leaf colour: Rich, mid-green. Not dark hunter green (nitrogen toxicity) and not pale or yellow (deficiency or pH lockout).
- Stem thickness: Increasing week over week, with a noticeable taper from base to tip. A thick base is the foundation of a high-yield plant.
- Growth rate: New nodes appearing daily. Healthy cannabis in a dialled-in environment grows visibly faster than you expect.
- Leaf orientation: Leaves angled upward toward the light, often described as "praying." This indicates optimal light intensity and an energised, photosynthetically active plant.
- Root health (where visible): White, firm roots in hydroponic systems or visible at drainage holes. Brown, mushy roots indicate root rot and demand immediate intervention.
The vegetative stage rewards growers who pay close attention and respond quickly. Master it — the environment, the nutrition, the training, and the timing, and every subsequent stage of your grow will be easier, more predictable, and significantly more productive.
For everything from strain selection to advanced cultivation technique, the Growing Marijuana resource library at Pacific Seed Bank has you covered. Find the perfect seeds for your next grow and build the foundation your harvest deserves.
Keep Reading

How Much Does It Cost To Grow Your Own Weed in Canada?
Learn the real costs of growing weed at home, including grow tents, lights, seeds, nutrients, electricity, and how much cannabis you can harvest.

The 5 Best Blueberry Cannabis Strains To Grow Indoors
Find the best blueberry weed strains to grow indoors, including Blue Dream, Blueberry Cheesecake, and more - and buy the seeds from Pacific Seed Bank.

Why 5.8–6.5 Is The Ideal pH for Cannabis (And When to Adjust)
Learn why 5.8-6.5 is the ideal pH for cannabis plants, how to test your plant's pH, and how to adjust it higher or lower when you need to.

The Best Autoflowering Light Schedule For Bigger Yields
Stop guessing your autoflowering light schedule. Our guide breaks down the 18/6, 20/4, and 24/0 schedules to help you grow bigger, better plants.