How to Grow Cannabis From Seeds: Your Ultimate Canadian Guide
· 14 min read · Updated May 14, 2026
Most first-time Canadian growers buy their seeds, lose a plant or two to overwatering or light-burn, and quietly wonder what went wrong. The answer is almost always the same: they skipped the fundamentals, or they hit a problem without knowing what to look for. This guide fixes that. From selecting the right seed type to cracking open your first curing jar, every stage of the cannabis life cycle is laid out here with the precision a Canadian garden — whether it's a 2×4 tent in a Vancouver apartment or a 4×8 room in a Winnipeg basement, actually demands.
Picking the Right Seeds for Your Goals and Space
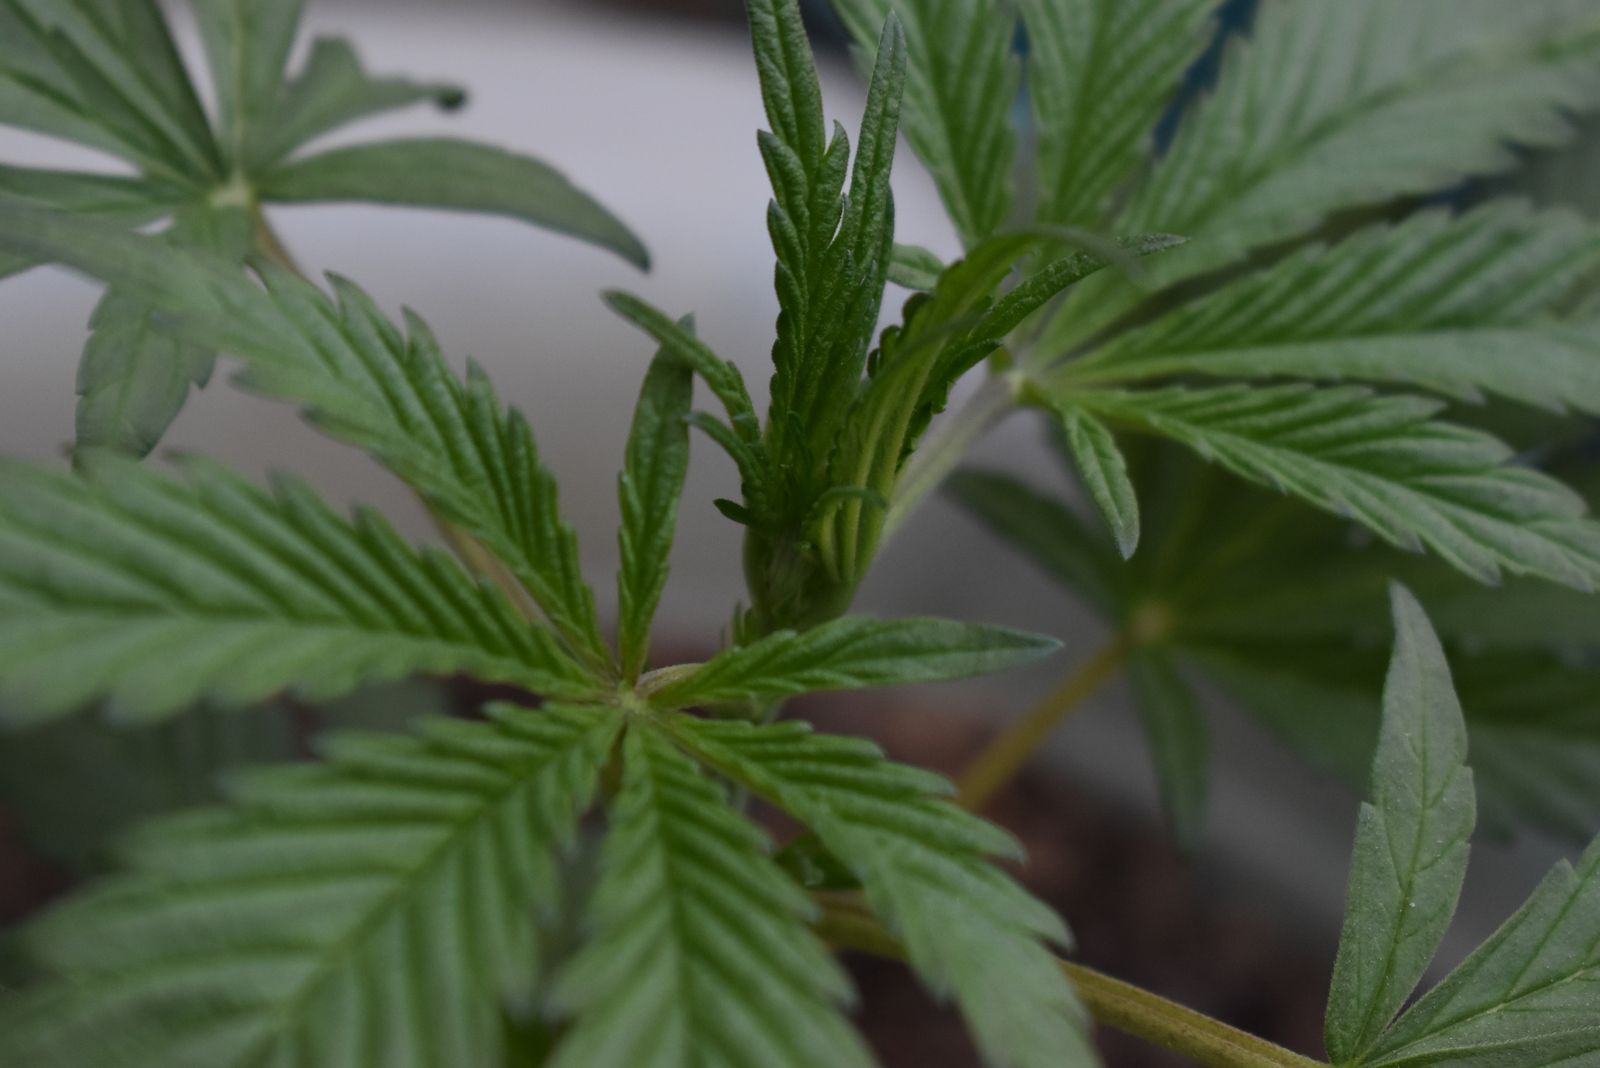
The seed is not a starting point — it is a decision. Everything that follows, from container size to harvest date, flows directly from what you drop into that germination medium. Understanding the three main seed categories before you buy saves weeks of frustration.
- Regular seeds produce roughly 50% male and 50% female plants. They are invaluable for breeders hunting phenotypes or building a genetic library, but for a home cultivator growing under the Canadian Cannabis Act's personal four-plant limit, males are wasted space.
- Feminized seeds are bred to produce only female plants — the ones that develop the resinous buds you're cultivating for. Nearly all commercial seed lines today are feminized, and they're the sensible default for anyone growing for personal use or small-scale cultivation.
- Autoflowering seeds flower based on age rather than photoperiod. They move from seed to harvest in as few as 70–80 days total, stay compact, and forgive the kind of light-schedule inconsistencies that trip up beginners. A strain like Gorilla Glue Auto, the legendary NYCD-crossed resin bomb in autoflowering form, can deliver dense, trichome-heavy harvests in under 11 weeks without ever touching a timer.
Genetics also split along the indica–sativa axis, and that axis has real practical meaning for your grow space. Indica-dominant strains — think the squat, fast-flowering Afghan-descended classics, typically stay under a metre indoors, finish in 8–9 weeks of flower, and suit tight tents perfectly. Sativa-dominant genetics stretch taller, sometimes doubling in height during the first two weeks of flowering, and often need 10–12 weeks to finish. Hybrids split the difference in useful ways: a 60/40 indica-dominant hybrid gives you manageable height with a yield profile that punches above its size.
If you're new and space-conscious, start feminized. If you want speed and simplicity, go auto. If you have the room and the patience, a sativa-leaning feminized strain will reward you with complexity that compact plants rarely match.
Germination: Waking the Seed Up Right
A seed that germinates poorly sets the ceiling for your entire grow. High germination rates — above 90% on quality seeds, are non-negotiable, which is why sourcing from a reputable Canadian seed bank matters before technique even enters the picture.
The paper towel method remains the most reliable approach for home growers:
- Dampen two sheets of paper towel with room-temperature, pH-balanced water (6.0–6.5).
- Place seeds on one sheet, fold the other over top, and set the parcel on a plate.
- Slide the plate into a warm, dark location — the top of a refrigerator or inside a cupboard near a heat source works well. Target 22–25°C.
- Check every 12–24 hours. Do not let the towels dry out completely.
- Once the white taproot is 3–5 mm long, transfer to your growing medium, taproot pointing downward, at a depth of about 1 cm.
Most quality seeds crack and show a taproot within 2–4 days. Stragglers can take up to seven. If a seed hasn't moved after ten days, it likely won't. Some growers prefer planting directly into moistened starter cubes or a light seedling mix, bypassing the towel entirely — this works well too, provided the medium stays consistently moist and warm. The main risk with direct planting is overwatering a medium you can't see inside; the paper towel method removes that guesswork.
Choosing Your Growing Medium
Your medium is the root zone, and the root zone is where yields are built or lost. Each option carries distinct advantages depending on your experience level and how much control you want.
Soil is the most forgiving medium on the list. A light, airy mix — one that crumbles rather than clumps, gives roots the oxygen they need while still holding enough moisture between waterings. A common winning recipe: 60% quality potting soil, 30% perlite for drainage and aeration, and 10% compost or worm castings for slow-release nutrients. Avoid any soil marketed for heavy clay retention or water conservation, those properties work against cannabis roots. The buffering capacity of good soil also means pH swings and minor feeding errors are absorbed before they show on leaves, which is precisely why beginners do best here.
Coco coir sits between soil and full hydroponics in both complexity and performance. It is an inert medium derived from coconut husks, which means it contains no inherent nutrients — you feed the plant directly through every watering, with precise control over what it receives. Growth rates in coco often outpace soil by 10–20% because roots access oxygen more freely and nutrient uptake is more consistent. The trade-off is that you must water more frequently and keep a closer eye on EC (electrical conductivity) and pH (target 5.8–6.2 in coco).
Full hydroponics — deep water culture, nutrient film technique, or Dutch bucket systems, removes solid medium from the equation almost entirely. Roots suspend in oxygenated, nutrient-rich water. Growth rates are the fastest of the three, and yields per square metre can be exceptional. But the margin for error shrinks dramatically: a pump failure, a pH drift, or a reservoir temperature spike can damage roots within hours. Hydro rewards experience.
Comparison at a glance: Soil is forgiving and nutrient-buffered, ideal for first grows. Coco offers faster growth with intermediate complexity. Hydro delivers peak performance but demands daily attention and a solid understanding of plant physiology before you commit.
Indoor Setup, Lighting, and Environmental Control
Light is the engine. Everything else is support infrastructure.
Modern quantum-board LED fixtures have made the old HPS vs. MH debate largely academic for Canadian home growers. A quality LED in the 600–800W equivalent range draws 300–400W from the wall, produces a full spectrum tuned for both vegetative and flowering growth, generates significantly less heat than HID alternatives, and lasts 50,000+ hours. In a country where electricity costs vary dramatically between BC's 9¢/kWh and Ontario's 14¢+/kWh on higher tiers, the efficiency gain matters to your operating costs over a full season.
Light schedules are straightforward for photoperiod-dependent feminized strains:
- Seedling stage (weeks 1–2): 18 hours on / 6 hours off, intensity kept low to avoid light stress on tender seedlings.
- Vegetative stage (weeks 3–8, or longer): 18/6 continues. This is when you build canopy, apply training techniques, and establish the structure that determines your final yield.
- Flowering stage: Switch to 12 hours on / 12 hours off. This mimics the shortening days of late summer and triggers the plant's reproductive response. Use a quality mechanical or digital timer — light leaks during the dark period can cause stress or, in worst cases, hermaphroditism.
Autoflowering varieties ignore the photoperiod entirely. Many growers run autos at 20/4 or even 18/6 from seed to harvest, maximising photosynthesis time without worrying about light-schedule triggers.
Airflow matters as much as light. An inline fan with a carbon filter manages odour (essential for apartment growers operating under Canadian Cannabis Act personal-use provisions) and drives transpiration, which is the mechanism that pulls water and nutrients up through the plant. Stagnant air breeds mould. Target a full air exchange every 1–3 minutes in your grow space.
Temperature, Humidity, and Vapour Pressure Deficit
Professional growers think in VPD — vapour pressure deficit, rather than just humidity or temperature in isolation. VPD is the relationship between the two, and it determines how aggressively a plant transpires and uptakes nutrients. But even without a VPD chart on the wall, keeping temperature and humidity within stage-appropriate ranges gets you 80% of the way there.
Target ranges by growth stage:
- Seedling: 22–26°C, 65–70% relative humidity (RH). Seedlings lack developed root systems and rely partly on leaf surface absorption — high humidity helps.
- Vegetative: 22–28°C, 50–65% RH. Plants are transpiring actively; this range supports vigorous growth without inviting foliar disease.
- Early flower: 20–26°C, 45–55% RH. Begin tapering humidity as bud sites form.
- Late flower (weeks 6–8+): 18–24°C, 38–45% RH. Dense buds with poor airflow at high humidity are a recipe for botrytis (bud rot), which can devastate a crop in days. If your grow space struggles to hit these numbers, our deep guide on managing humidity in a grow tent covers both raising and lowering strategies.
Night temperatures 4–6°C cooler than daytime temperatures are normal and acceptable. Sharp swings of 10°C or more cause stress, slowed growth, and in sensitive genetics, colour changes that look dramatic but signal the plant is spending energy on temperature response rather than bud development. A quality thermometer-hygrometer combo unit — under $30 CAD at most Canadian hardware stores, is a non-negotiable piece of kit.
Watering and Feeding Your Plants
Overwatering kills more cannabis plants in Canadian home grows than any other single mistake. The signs are subtle at first — slight drooping, slow growth, and by the time most growers recognise the problem, root health has already suffered. The fix is a simple discipline: let the top 2–3 cm of soil dry out before watering again, and lift the container. A pot that feels noticeably lighter than it did when freshly watered is ready. A pot that still feels heavy isn't.
For a thorough breakdown of timing, volume, and soil-moisture cues, our dedicated guide on watering cannabis plants covers the full methodology by container size and growth stage.
Feeding follows a predictable arc across the plant's life cycle:
- Seedling (weeks 1–2): No additional nutrients needed if starting in a pre-amended mix. Overfeeding seedlings causes fertiliser burn within days.
- Vegetative growth: Higher nitrogen (N) demand. An NPK ratio weighted toward N — something like 3-1-2 — supports rapid leaf and stem development. Begin at 50% of the recommended dose and increase based on plant response.
- Transition to flower (weeks 1–3 of flower): Reduce nitrogen, begin increasing phosphorus (P) and potassium (K). A 1-3-2 ratio targets bud site initiation.
- Peak flower: Low N, high P and K. Many growers use dedicated bloom boosters here. CalMag supplementation is important in coco and soft-water environments.
- Flush window (final 7–14 days before harvest): Run plain, pH-balanced water through the medium to clear residual salts and improve final flavour. Our guide on how to Flush cannabis plants details the process, timing, and what runoff EC to target.
Yellowing lower leaves late in flower is normal — the plant is cannibalising mobile nutrients like nitrogen as it prioritises bud development. Generalised yellowing mid-veg is not normal and warrants a closer look at pH, root health, or feeding frequency.
Transplanting and Training for Maximum Yield
Starting seeds in a small container — a 10 cm pot or a rapid rooter, and transplanting into progressively larger homes as the root ball develops is the standard approach for photoperiod plants. A seedling in an oversized pot tends to sit in wet, cold growing medium between waterings, which stresses roots and slows growth. A plant that has filled its current container with healthy white roots, on the other hand, transitions into a larger pot with minimal shock.
A common container progression for a photoperiod feminized plant grown to full size: 10 cm nursery pot → 3.8 L (1 gal) → 11 L (3 gal) → 19–30 L (5–8 gal) final container. Water gently after each transplant and keep the plant in slightly lower light intensity for 24–48 hours while it settles.
Training shapes the plant's canopy and directly multiplies your yield per watt. The most effective approaches for home growers:
- Topping: Remove the apical (top) growing tip during veg. The plant responds by developing two new main colas instead of one, creating a more even, bushier canopy.
- Low-stress training (LST): Gently bend and tie down branches to expose bud sites that would otherwise sit in the shade. Produces minimal stress and can be applied throughout veg.
- SCROG (Screen of Green): A horizontal net or trellis stretched over the canopy. As branches grow through the screen, they're woven horizontally, distributing the canopy evenly and pushing dozens of bud sites into the same light plane.
- Strategic pruning and defoliation: Removing undergrowth and fan leaves that block airflow and light penetration concentrates the plant's energy on productive bud sites. Our full guide on pruning cannabis walks through timing and technique so you don't over-strip the canopy.
Autoflowering varieties have compressed vegetative windows — typically 3–4 weeks, which limits aggressive training. LST and light defoliation work well on autos; topping is risky because the plant may not have enough veg time to recover before flower is triggered.
Watching for Pests, Deficiencies, and Early Warning Signs
A clean grow space is your first line of defence. Cannabis pests and pathogens rarely appear from nowhere — they hitchhike in on clothing, tools, contaminated soil, or unsterilised water. Keeping the floor swept, removing dead plant material promptly, and quarantining any new plants before introducing them to your space eliminates most vectors before they become problems.
The most common indoor threats and what to look for:
- Fungus gnats: Small flies hovering around the soil surface. Their larvae damage roots. Caused almost entirely by overwatering. Let the medium dry out between waterings and use yellow sticky traps to monitor adult populations.
- Spider mites: Tiny dots on leaf undersides, fine webbing between branches. Thrive in hot, dry, low-humidity conditions. Increase airflow and use neem oil sprays during early veg as both a treatment and a preventative — avoid spraying during flower as it can affect terpene expression and taste.
- Powdery mildew: White powder on leaf surfaces. A humidity and airflow issue. Increase circulation, lower RH, and remove affected leaves.
- Nutrient deficiencies vs. toxicities: Interveinal chlorosis (yellowing between green veins) often signals iron or magnesium deficiency. Dark, clawed leaves suggest nitrogen toxicity or overwatering. Burnt leaf tips are a classic sign of fertiliser salt build-up.
Leaves are your plant's communication system. Curling upward ("taco-ing") typically means heat stress or under-watering; downward cupping points to overwatering or nutrient lockout. Neither problem requires panic — they require diagnosis and one measured adjustment at a time.
Flowering, Trichome Monitoring, and Knowing When to Harvest
The 12/12 light switch triggers flowering in photoperiod plants. Over the first two weeks, you'll see pistils (white hairs) emerging from bud sites and a rapid stretch in height — some sativa-dominant varieties can double or triple in height during this pre-flower surge. By week three or four, buds are stacking and terpene production is ramping up. By week six, the true character of the strain is on full display: a diesel-forward Gorilla Glue phenotype will fill the room with a fuel-and-coffee edge; a fruity Wedding Cake cuts through with vanilla and earth.
Flowering duration varies meaningfully by strain type. Most indica-dominant feminized varieties finish in 8–9 weeks of flower. Hybrid strains typically run 9–10 weeks. Sativa-dominant genetics or haze-influenced varieties can push 11–13 weeks. Autoflowering strains typically complete their entire life cycle — from seed to harvest, in 70–85 days, regardless of light schedule.
Trichome colour is the most reliable harvest indicator available to a home grower. Under a 60–100× jeweller's loupe or a digital microscope:
- Clear trichomes: THC is still building. Not ready.
- Milky/cloudy trichomes: THC is at or near peak. Harvest here for a more energetic, cerebral effect.
- Amber trichomes: THC is degrading to CBN. 10–30% amber alongside mostly cloudy trichomes produces a heavier, more sedative effect. Most growers target a cloudy-dominant mix with 10–20% amber for a balanced result.
Pistil colour is a secondary cue: 70–80% of white hairs turning orange or red typically coincides with the cloudy trichome window. Use it to narrow your inspection timing, not as a standalone harvest trigger.
Drying, Curing, and Getting the Most From Your Harvest
Harvest is not the finish line. What you do with the next four to eight weeks determines whether those buds smoke like a well-grown craft product or like something hastily dried over a furnace vent.
Hang whole branches or individual colas upside down in a dark room at 15–21°C with 45–55% RH and gentle airflow — not direct fan blast, for 7–14 days. Slow drying preserves terpenes and allows chlorophyll to break down evenly. When small stems snap rather than bend and the outside of buds feels dry but the interior still holds slight moisture, it's time to trim (if you wet-trimmed at harvest, this step is shorter) and jar.
Curing in glass Mason jars is the standard for a reason: glass is inert, seals cleanly, and lets you burp the jars with precision.
- Fill jars 75–80% full. Don't pack buds tightly.
- Open ("burp") jars twice daily for the first week, for 10–15 minutes each time. This releases accumulated moisture and CO₂.
- In week two, reduce burping to once daily. Watch for any ammonia smell — a sign of anaerobic bacterial activity from excess moisture. If you detect it, leave lids off for several hours and monitor closely.
- By weeks three and four, burp every 2–3 days. The terpene profile deepens and smooths considerably during this period.
- After four weeks, the cure is functional. After eight weeks, it is exceptional.
Boveda or Integra humidity packs (58% or 62% RH) inserted into jars after the active cure phase maintain the ideal moisture window during long-term storage.
For everything else in between — strain-specific grow strategies, advanced training methods, and troubleshooting deep dives, our full library of Growing Marijuana guides at Pacific Seed Bank Canada has you covered.
Growing cannabis from seeds is a skill that compounds. Your first harvest will teach you more than any single article can, and your third will produce something your first-run self wouldn't recognise. Give every stage the attention it earns, keep a grow journal, and treat each problem as data rather than failure. The plants always tell you what they need — your job is simply to learn how to listen.
Keep Reading

How Much Does It Cost To Grow Your Own Weed in Canada?
Learn the real costs of growing weed at home, including grow tents, lights, seeds, nutrients, electricity, and how much cannabis you can harvest.

The 5 Best Blueberry Cannabis Strains To Grow Indoors
Find the best blueberry weed strains to grow indoors, including Blue Dream, Blueberry Cheesecake, and more - and buy the seeds from Pacific Seed Bank.

Why 5.8–6.5 Is The Ideal pH for Cannabis (And When to Adjust)
Learn why 5.8-6.5 is the ideal pH for cannabis plants, how to test your plant's pH, and how to adjust it higher or lower when you need to.

The Best Autoflowering Light Schedule For Bigger Yields
Stop guessing your autoflowering light schedule. Our guide breaks down the 18/6, 20/4, and 24/0 schedules to help you grow bigger, better plants.