How to Harvest Cannabis: Timing, Techniques, and Tips
· 9 min read
Months of meticulous care — precise watering schedules, dialled-in light cycles, careful canopy management, all of it converges on a single window that can last as few as five to seven days. Miss it in either direction and you pay a real price: harvest too early and underdeveloped trichomes mean weaker THC and thin flavour; wait too long and cannabinoid degradation, particularly the conversion of THC to CBN, robs your buds of potency and replaces that crisp, energetic high with something heavy and sedative. Understanding exactly when and how to cut is the skill that separates an average grow from an exceptional one.
What to Know Before You Harvest Cannabis
The two weeks leading up to harvest are as important as any other phase of the grow. Most experienced cultivators flush their medium during this window — running clean, pH-balanced water (target 6.0–6.8 for soil, 5.8–6.2 for coco or hydro) through the root zone until runoff readings stabilise close to the input values. Flushing evacuates residual salt build-up from weeks of feeding, and the result in the jar is noticeably smoother smoke with a cleaner finish on the palate.
Flushing is not universally mandatory.
Growers in living soil or no-till systems often skip it entirely, arguing that a thriving microbial community processes excess nutrients naturally. In synthetic salt grows, however, it's hard to argue against. Run enough water to equal roughly three times the container volume, let the medium settle, then repeat. Your plants will show mild stress — and that's fine. Yellow leaves, reddish stems, and chlorotic lower fan leaves during this period are normal signs of nitrogen draw-down, not a problem to solve.
In the final 48–72 hours before cut day, consider dialling back humidity in your grow space to around 40–45% RH. Lower ambient moisture combined with a slight controlled dry-down of the root zone encourages the plant to concentrate essential oils in the trichome heads — a stress response that can meaningfully intensify terpene expression and tighten bud density. Some cultivators also drop temperatures by 5–8°C during the final dark period to coax out anthocyanin-driven purple and blue hues in susceptible cultivars.
How to Tell If Your Cannabis Plants Are Ready to Harvest
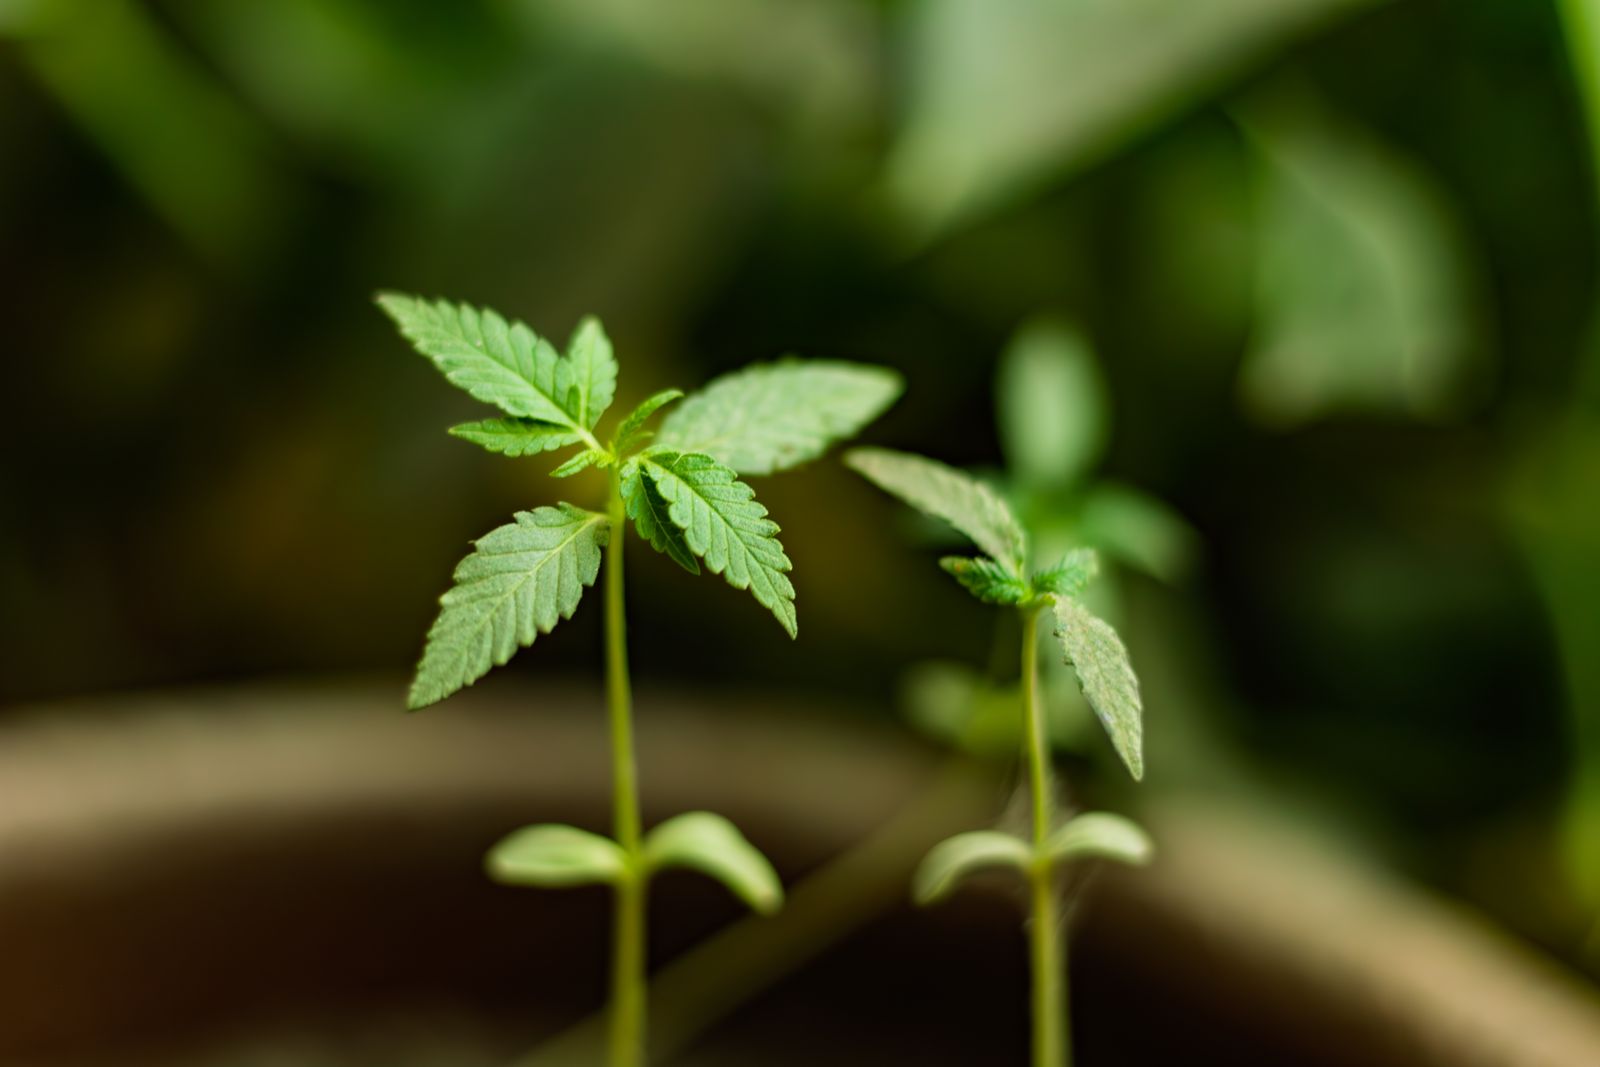
The seed bank's recommended flowering window is your starting point, not your finish line. Environmental variables — canopy temperature, vapour pressure deficit, root-zone health, training stress, can shift a cultivar's actual finish date by one to two weeks in either direction. Always verify readiness with your own eyes.
There are two primary methods growers rely on, and they work best used together:
The Pistil Method
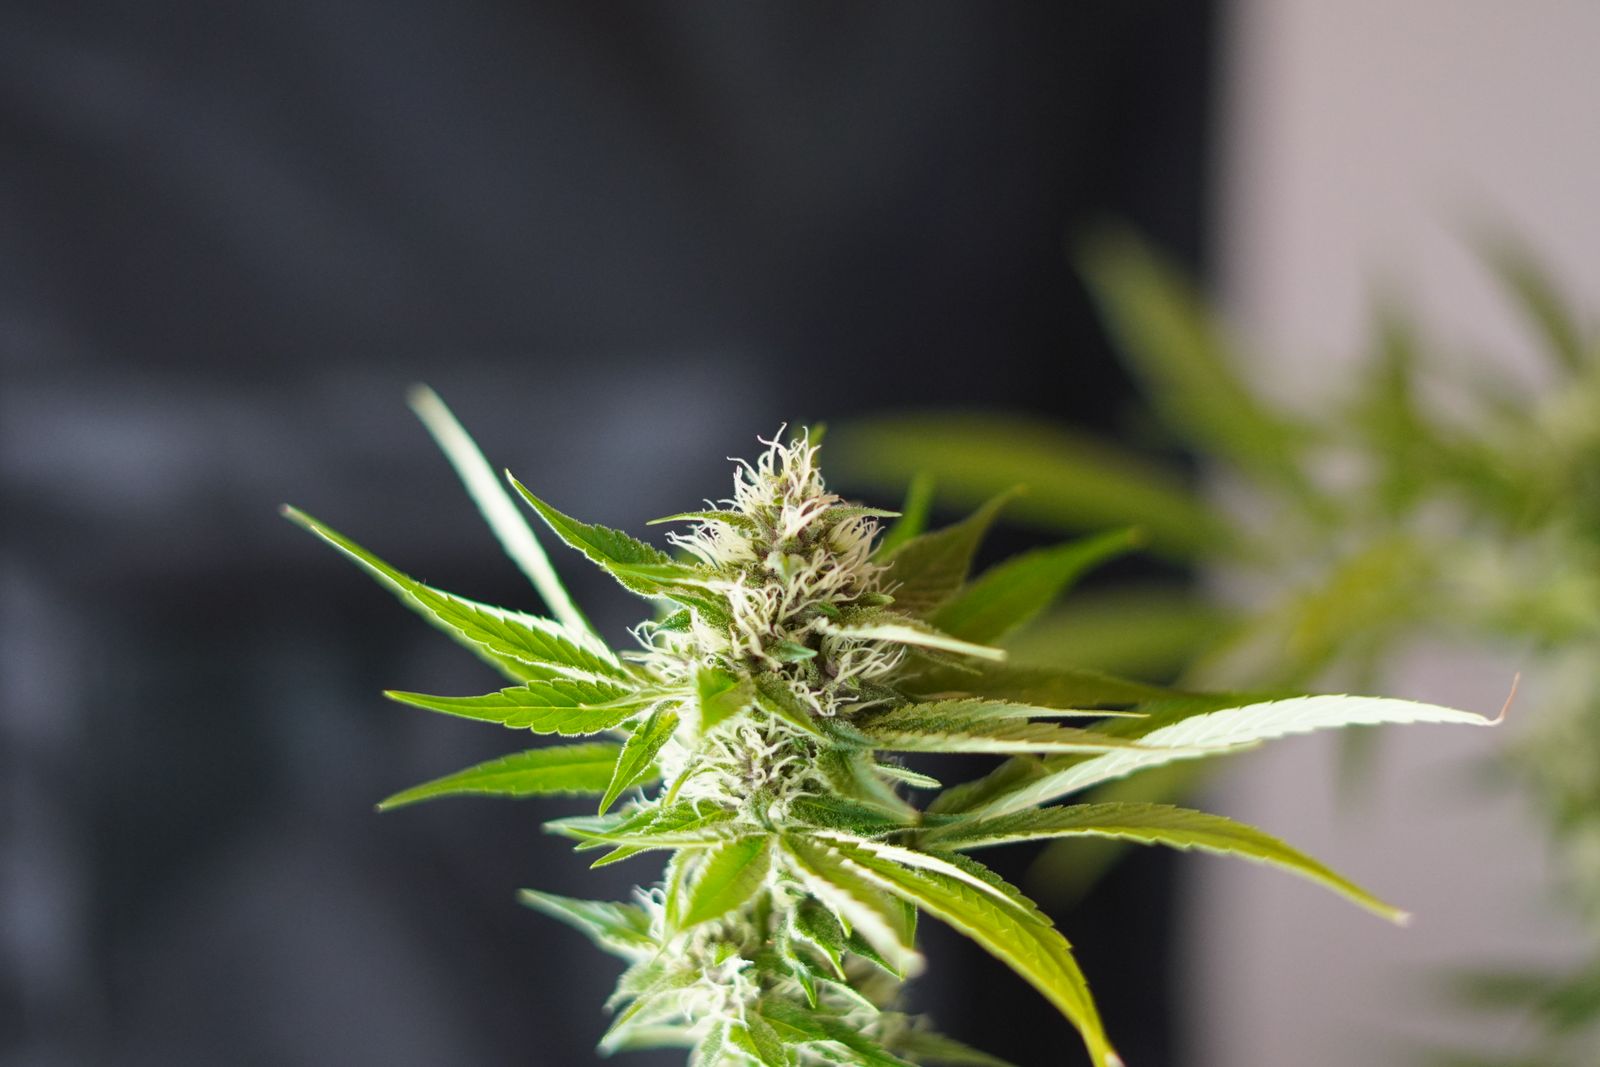
Pistils are the hair-like reproductive structures that emerge from each calyx. Early in flowering they're almost universally pale and straight. As the plant matures, they darken — shifting through orange, red, and gold, and curl inward toward the bud. A general read: when 50–70% of visible pistils have darkened and curled, you're approaching the harvest window. When 70–90% have changed colour, most cultivars are at or near peak ripeness.
This method is quick and requires no tools, but it's imprecise. Certain cultivars — dense, tightly packed phenotypes especially, barely change pistil colour before they're fully ripe. Use it as a first alert, then confirm with trichomes.
The Trichome Method
This is the gold standard. A 60x–100x jeweller's loupe or a digital microscope (under CAD $50 at most grow shops) lets you examine the trichome heads directly. Here's what each stage means:
- Clear trichomes: The plant is still building cannabinoids. Harvest now and you'll be significantly under-potency. Wait.
- Cloudy/milky white trichomes: THC is at or near its ceiling. The effect profile will be cerebral, energetic, and sharp. For most cultivars targeting recreational potency, 80–90% cloudy is the sweet spot.
- Amber trichomes: THC is converting to CBN. The high becomes heavier, more sedative, and body-focused. If you're growing for insomnia or chronic pain relief, waiting for 20–30% amber alongside 70% cloudy can be intentional strategy — not a mistake.
When watering your plants through late flower, also take a moment to check trichomes on the same day each week under consistent lighting — trichome colour can look dramatically different under a blurple LED versus natural light. Build a consistent observation routine and you'll catch the window reliably every time.
If you're growing with seeds from Pacific Seed Bank, the strain packaging will note a recommended harvest window. The White, a feminized cultivar celebrated for its extraordinary resin production and near-opaque trichome coverage, is a particularly rewarding strain to watch under magnification — the density of milky heads at peak ripeness is genuinely striking. Cross-reference that recommended window with your trichome checks, and you'll never cut early again.
How to Choose: Wet Trimming or Dry Trimming
How you trim shapes the final product almost as much as how you grew it. The decision between wet and dry trimming isn't one-size-fits-all — it depends on your climate, your workflow, and the end result you're chasing.
Wet trimming means removing fan leaves and sugar leaves immediately after cutting the plant down, while the tissue is still fresh and pliable. The advantages are real: sugar leaves stand out clearly from the bud, scissors move easily through soft material, and the reduced leaf surface area means buds dry faster — a genuine benefit if your drying space runs humid (above 55% RH). The tradeoff is that aggressive wet trimming can shave off trichomes from the outermost bud surface, and faster drying sometimes means less time for terpene development during the cure.
Dry trimming means hanging whole branches — fan leaves and all, and letting the plant dry slowly before you touch the buds. The remaining leaf matter acts as a humidity buffer, slowing the drying rate to a more controlled 10–14 days in ideal conditions (60°F / 15.5°C, 55–60% RH). The result is often a more aromatic, flavourful final product, particularly for terpene-forward cultivars where myrcene, linalool, and terpinolene expression is the selling point. In a dry Canadian climate, especially in winter with forced-air heat running, dry trimming is almost always the better call.
The comparison in a single line: wet trimming prioritises efficiency and speed; dry trimming prioritises aroma, flavour, and trichome preservation. Many seasoned growers use a hybrid approach — removing only the large fan leaves immediately, then hanging branches and completing the fine trim once dry.
Steps to Harvest Cannabis Plants
When your trichomes confirm you're in the window, it's go time — and that name isn't accidental. Go Time is a feminized cultivar built for growers who want vigour and reward, and its resin-coated buds at harvest day are a reminder of why the process matters. Pull on a pair of nitrile gloves (trichome resin is tenacious and will coat unprotected hands within minutes), set up your trimming station with clean, sharp scissors or pruning shears, and work methodically.
- Cut the plant at the base or section into branches. If you're dry trimming, cut branches to a manageable length (30–45 cm) and hang them upside down on a wire or rack in your drying space. If wet trimming, lay branches on a clean surface and begin immediately.
- Remove fan leaves first. These large, starchy leaves contain minimal cannabinoids and will slow drying if left on. Work top-down along each branch, pulling fan leaves by hand or cutting at the petiole.
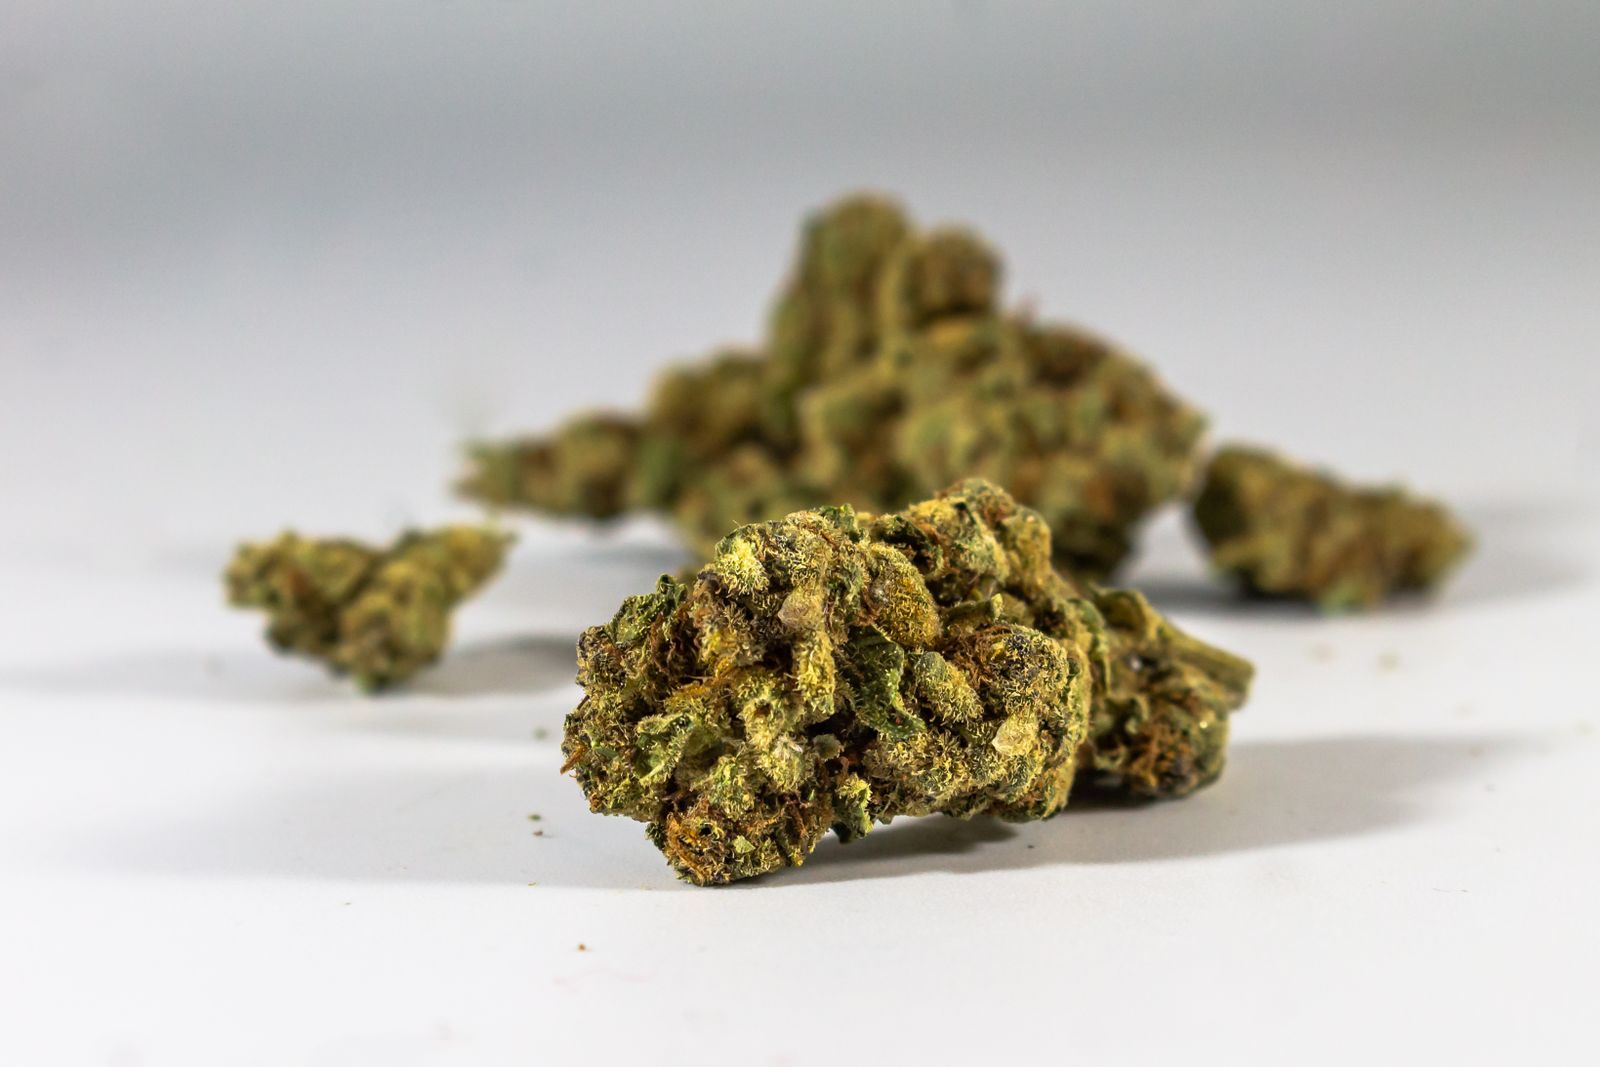
- Trim sugar leaves. These are the small, resin-dusted leaves that protrude from inside and around the bud structure. Trim close to the bud surface without gouging into it. A slight inward tuck of the wrist keeps scissor tips away from the calyxes. Save trimmed sugar leaves for making hash, kief, or infused butter — the trichome density makes them far too valuable to compost.
- Manicure bud by bud. Once branches are stripped, work each individual bud, rotating it and snipping any remaining leaf tips that poke out beyond the trichome line. The goal is a tight, well-defined bud with clean sightlines into the calyx stack.
- Hang or rack to dry. Maintain your drying environment at 15–18°C and 55–60% RH with gentle air circulation (a fan oscillating on a low setting, not pointed directly at buds). Check daily. Most well-dried buds are ready to jar when small stems snap rather than bend — typically 10–14 days for dry-trimmed branches, 6–10 days for wet-trimmed buds on a rack.
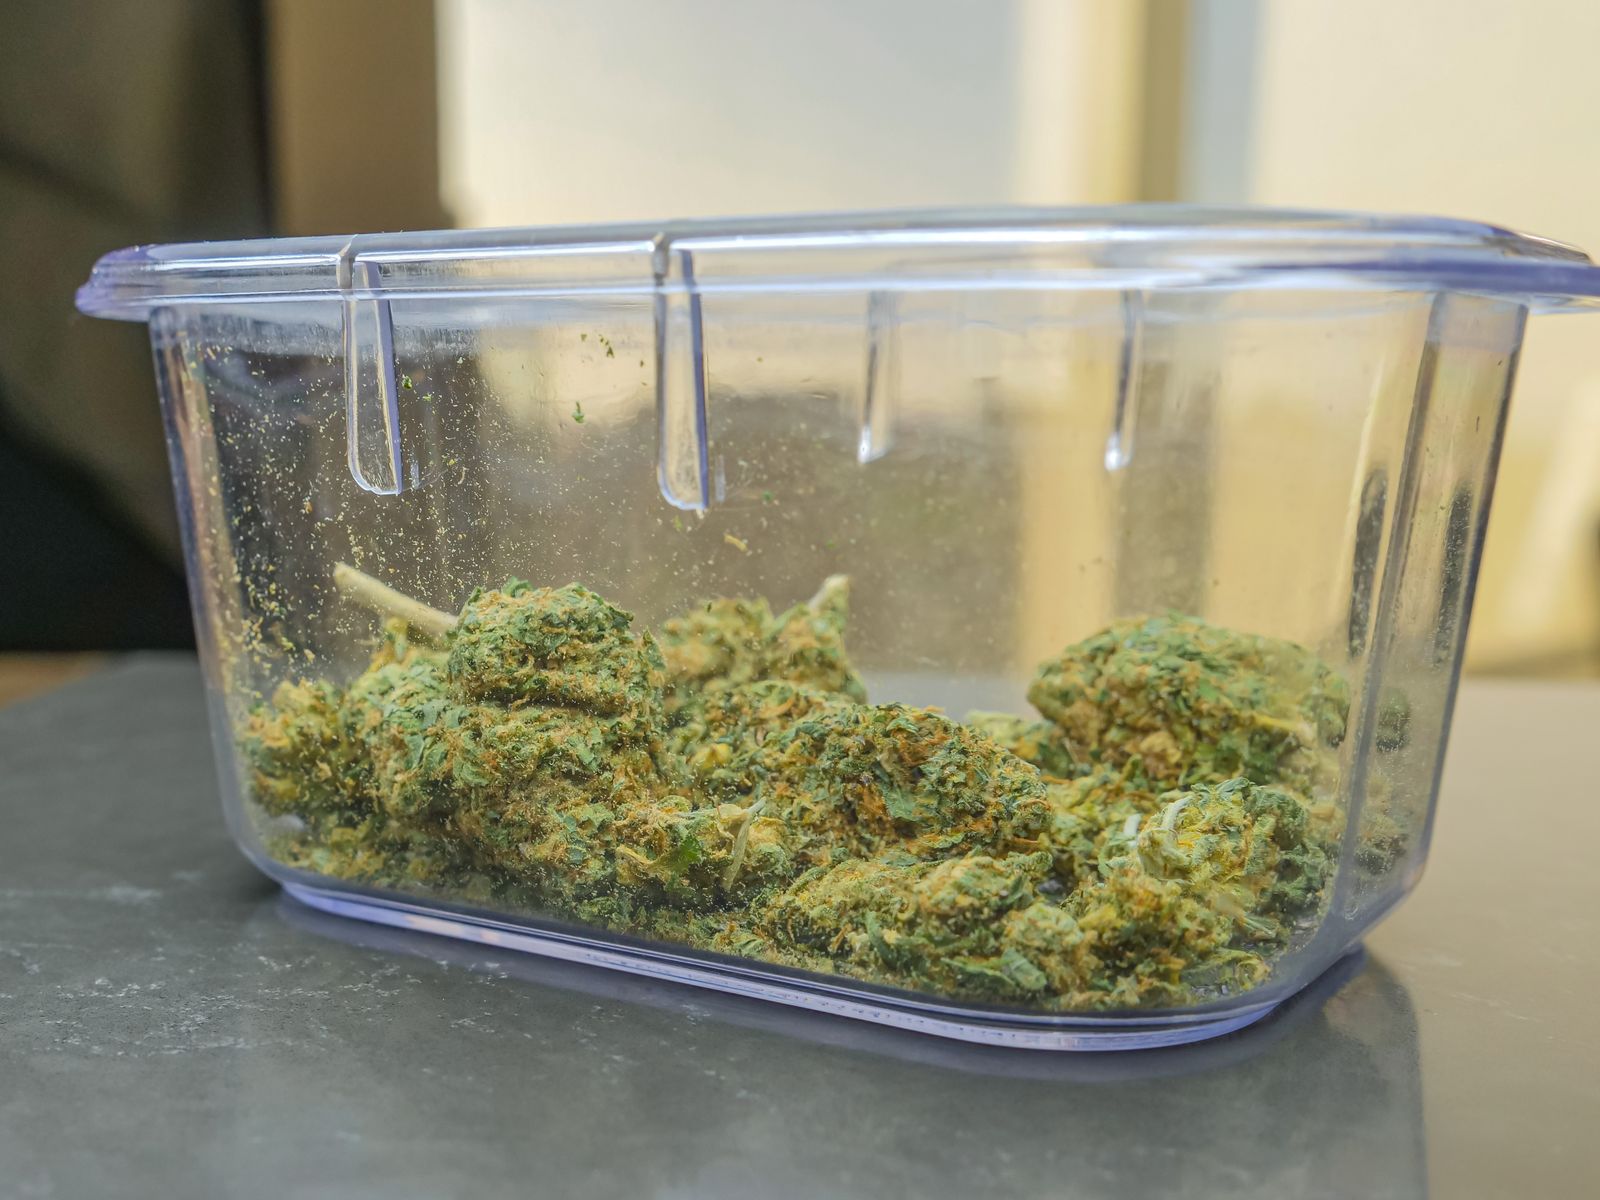
- Cure in sealed jars. Pack buds loosely into wide-mouth glass jars to about 75% capacity. For the first two weeks, "burp" jars twice daily for 10–15 minutes to release accumulated moisture and CO₂. After two weeks, burp once daily. By week four, flavour and aroma will have developed noticeably. By week eight, you're working with a genuinely refined product — terpene profiles that were sharp and one-dimensional at week two become layered, complex, and persistent.
One critical note on curing environment: if you open a freshly jarred batch and detect ammonia or an overly "green" hay-like smell, the buds went into the jar too wet. Spread them on a rack for several hours, then re-jar. Ammonia indicates microbial activity and must be addressed immediately to prevent mould from taking hold.
Common Harvest Mistakes (And How to Avoid Them)
Even experienced growers make the same handful of errors at harvest. Knowing them in advance means you won't repeat them.
- Harvesting by calendar alone. A strain listed as "8–9 weeks flowering" might finish in 10 weeks under your specific conditions. Trichomes don't lie; calendars do.
- Drying too fast. Temperatures above 24°C or humidity below 45% RH during drying evaporates terpenes before they can bind through the cure. The result is harsh, flat smoke. Slow and cool is always better.
- Skipping the cure entirely. Freshly dried cannabis is dramatically inferior to a properly cured product. The enzymatic and chemical changes that occur in the jar over 4–8 weeks are not cosmetic — they materially improve smoothness, flavour complexity, and the overall experience.
- Harvesting the entire plant at once without checking canopy variation. On a large plant or one that hasn't been trained to an even canopy, upper colas and lower popcorn buds can differ by 10–14 days of maturity. Consider a staged harvest: cut top colas when ready and leave lower sites to ripen for another week.
- Using dirty tools. Isopropyl alcohol-wipe your scissors every 20–30 minutes during trimming. Resin-clogged blades crush and drag instead of cut cleanly, damaging bud structure and creating unnecessary trichome loss.
About Pacific Seed Bank
Everything described above — the trichome checks, the flush timing, the cure, only reaches its full potential when it starts with genetics worth growing. Pacific Seed Bank was built on that premise: 100% feminised seeds, verified genetics, and over 20 years of horticultural expertise behind every strain in a catalogue that now spans more than 150 cultivars. No male plants, no mystery crosses, no inflated claims, just consistent, high-performing seeds selected by people who actually grow.
Our team includes horticulturists, medical professionals, and lifelong cannabis cultivators who understand that a grower's time is worth more than a bargain-bin price tag. Yes, premium genetics cost more than the cheapest option on the market — but a single high-quality harvest from a well-chosen cultivar will demonstrate exactly why the investment makes sense. Explore our full strain library, strain guides, and growing resources in our Marijuana Education section, and grow something you'll be genuinely proud to put in a jar.
The harvest window is the culmination of everything you've invested in a grow. Nail the timing with trichome observation, choose your trim method deliberately, dry slowly, and cure with patience. Do those four things consistently and the quality of your cannabis will reflect it in every session — richer aroma, more complex flavour, and effects that land exactly where you want them.
Keep Reading
Do Pot Seeds Go Bad? The Real Scoop on Seed Shelf Life
Do pot seeds go bad? Yup. Find out how long cannabis seeds last, how to spot bad ones, and the best storage tricks to keep your seeds viable for years.
Cannabis Terms Explained: Vocabulary For New Growers
Cannabis Seed Storage Tips for Maximum Shelf Life